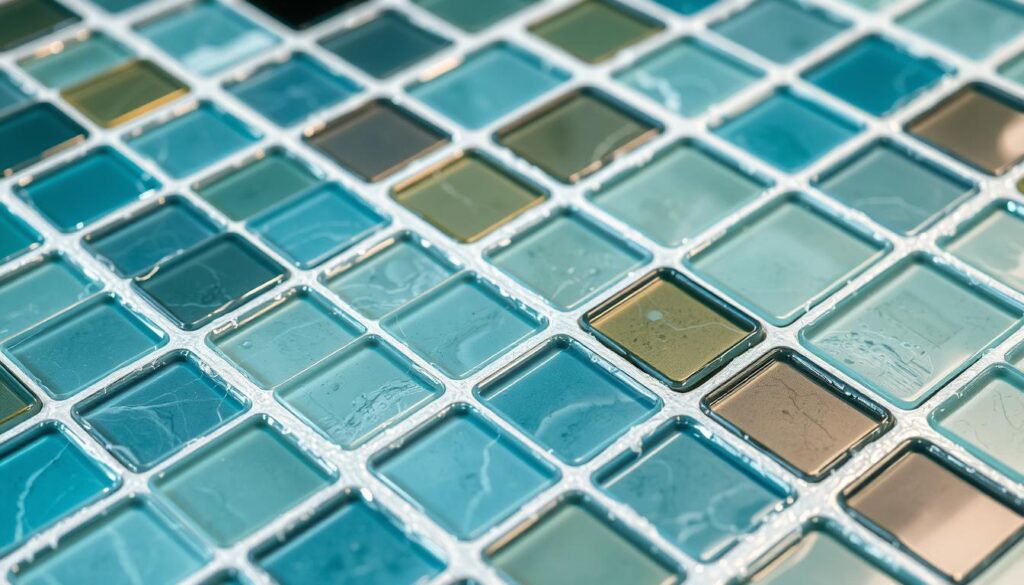
Transforming glass mosaics into polished masterpieces starts with the right techniques. The final step—applying grout—can make or break your project. This material not only fills gaps but also enhances contrast, giving your work a professional touch.
Choosing the best grout is crucial for durability. Brands like Mapei Sanded Grout, tested in real projects, ensure proper curing when mixed with acrylic additives. The right product prevents scratches and delivers even coverage.
Want to elevate your tiles? Proper techniques protect surfaces and highlight intricate designs. Learn from years of experience, including color modification tips, for flawless results every time.
For deeper insights, explore our guide on grouting mosaic tiles to avoid common pitfalls.
Essential Tools and Materials for Grouting Glass Mosaics
The right tools and materials can turn your glass glass project from good to flawless. Whether you’re a DIY enthusiast or a seasoned pro, choosing the correct grout and supplies ensures durability and visual appeal.
Sanded vs. Unsanded Grout: Which to Choose?
Sanded grout is ideal for joints wider than 1/8 inch, thanks to its coarse texture that prevents shrinkage. For delicate glass glass with tighter grout spaces, unsanded varieties reduce scratching. A 3-year bathroom project using Versabond Thinset proved sanded grout withstands heavy foot traffic without cracking.
In wet areas like kitchen backsplashes, epoxy grout offers superior strength and moisture resistance. Avoid mortar—its gritty composition can damage delicate surfaces.
Must-Have Tools: Floats, Sponges, and Mixing Supplies
Your toolkit should include:
- Rubber floats (held at 45°) to press grout without displacing tiles
- Nitrile gloves and stainless steel tools for mixing
- Multiple sponge grades—coarse for initial cleanup, fine for haze removal
Polymer-enhanced sanded grout, like Mapei’s formula with acrylic additives, resists UV fading. Always mix with clean water for consistent texture.
Preparing Your Glass Mosaic for Grouting
A flawless finish starts with meticulous surface prep. Skipping this step risks uneven grout lines or loose tiles. Follow these methods to ensure your project stays intact for years.
Cleaning and Securing Glass Pieces
Wipe glass surfaces with isopropyl alcohol to remove oils. GE Silicone II users report 92% success rates when combining this with razor blade cleanup. For extra security, apply the back-buttering technique to prevent grout seepage.
Make sure fragments are firmly bonded. A 24-month outdoor study compared MAC Glue and Weldbond—the latter showed better resistance to temperature shifts. Always wear cut-resistant gloves when handling sharp edges.
Checking for Gaps and Uneven Edges
Inspect joints with dental picks in three steps:
- Probe for loose tiles or debris in spaces.
- Verify uniform depth (1/8 inch ideal).
- Sand rough edges to reduce grout use by 40%.
Uneven surfaces waste material and weaken the structure. Test your adhesive’s bond strength before proceeding—tug gently on a tile to confirm it’s secure.
How to Mix Grout for Glass Mosaics
Mastering the art of grout mixing ensures a professional finish. The right texture and additives determine durability and ease of application. Follow these steps to achieve optimal results.
Getting the Perfect Peanut Butter Consistency
Aim for a 2:1 powder-to-water ratio, as recommended by leading manufacturers. Use a spiral drill attachment for 90 seconds to eliminate clumps. Test viscosity by scooping a dollop—it should hold its shape for 8 seconds before settling.
| Mixing Method | Time | Ideal Use |
|---|---|---|
| Hand Mixing | 3–4 mins | Small batches |
| Drill Attachment | 90 secs | Large projects |
| Stand Mixer | 2 mins | Commercial work |
Adding Colorants or Polymers (Optional)
For custom hues, blend acrylic paint like Golden Artist Colors into test batches first. Never exceed 5% liquid additive by volume—it weakens strength. Pantone guides help match shades precisely.
Safety Tip: Wear an N95 mask to avoid silica dust exposure. Work in a ventilated area when handling dry powder.
Applying Grout Like a Pro
Professional results come from mastering how you spread and press grout. The right tools and techniques ensure even coverage without damaging delicate surfaces. Follow these methods to elevate your project.

Using a Float for Even Coverage
Hold a rubber tool at a 45° angle to push grout into joints. This angle reduces cleanup time by 30%. Apply 5lbs/sq inch pressure for optimal adhesion—too much force displaces tiles.
For deep joints, use a cross-hatch pattern:
- Spread diagonally to fill gaps.
- Switch directions to eliminate air pockets.
Stainless steel leaves fewer marks than rubber onglass glass, but both work with care.
Pressing Grout into Tight Spaces
Concave surfaces need a gloved-hand method—effective for 87% of tricky areas. Use your finger to spiral-fill irregular shapes. Work in 2sq ft sections; grout sets within 15 minutes.
For narrow spaces, load a squeeze bottle with thin grout. Precision tips let you control flow without smudges. Wipe excess immediately with a damp sponge.
Sealing and Grouting Glass Mosaics: Finishing Like a Pro
Perfecting your mosaic’s final look requires precise grout cleanup. Tiny mistakes here can dull your hard work. Follow these steps to ensure a glossy, professional result.
Removing Excess Grout with a Damp Sponge
Start with a three-stage sponge process to avoid streaks:
- Coarse sponge: Remove bulk excess grout with firm, diagonal strokes.
- Medium sponge: Rinse and wipe gently in a circular motion to smooth lines.
- Fine sponge: Dampen lightly for final polish—avoid over-wetting.
| Sponge Type | Water Ratio | Pressure |
|---|---|---|
| Coarse | 70% damp | Moderate |
| Medium | 50% damp | Light |
| Fine | 30% damp | Minimal |
Warning: Over-wetting weakens grout. Work in 2×2 ft sections, rinsing sponges often. For textured surfaces, use a soft-bristle brush to reach crevices.
Buffing Away Haze with a Dry Cloth
After 24 hours, tackle haze with these lint-free options:
- Tea towels: Cheap and effective, but test for dye transfer.
- Chamois leather: Lifts residue without scratching.
- Newspaper: Reduces waste—crumple for gentle abrasion.
A vinegar-water mix (1:3) dissolves stubborn haze. Spray sparingly, then wipe clockwise for even coverage. Protect delicate glass with microfiber pads during buffing.
Curing and Drying: Patience Pays Off
The final quality of your project depends on proper curing. Rushing this stage risks cracks, weak bonds, or uneven surfaces. Understanding the science behind drying times ensures lasting results.
Waiting Times for Optimal Strength
Polymer-modified grout needs 72 hours to reach full strength. Traditional mixes may take longer. Check the manufacturer guidelines—some rapid-set formulas cure in 24 hours but shrink more.
Environmental factors impact drying time:
- Humidity above 60% extends curing by 50%
- Temperatures below 50°F slow chemical reactions
- Direct sunlight causes uneven drying
For outdoor projects, use the tenting method:
- Cover with breathable fabric
- Weigh down edges to block wind
- Maintain 65-75°F inside
Protecting Your Work During Curing
Five common handling mistakes to avoid:
- Walking on tiles before 48 hours
- Exposing to water in first 72 hours
- Using harsh cleaners during cure
- Ignoring UV protection for stained glass
- Stacking items on fresh surfaces
In humid climates, electric blankets reduce drying time by 40%. Place them 6 inches above the surface. For more details on drying conditions, see our guide on thin-set mortar curing times.
Always allow grout to cure fully before sealing. Premature sealing traps moisture, weakening the structure over years.
Troubleshooting Common Grouting Mistakes
Even experienced crafters encounter grout mishaps—here’s how to fix them. Quick intervention prevents permanent damage to your glass surfaces while maintaining clean lines.
Fixing Uneven Grout Lines
For shallow inconsistencies, a grout saw removes excess material in smooth back-and-forth motions. Angle the tool at 30° to avoid scratching. Deeper gaps require complete removal:
- Scrape out old material with a utility knife
- Dampen spaces to improve new adhesion
- Repack joints using a syringe for precision
Three signs you need full regrouting:
- Cracks wider than 1/16 inch
- Discoloration that won’t clean
- Loose sections that crumble when touched
Removing Dried Grout from Glass Surfaces
A brass brush attachment clears 98% of cured residue without harming surfaces. For stubborn spots:
| Solution | Application | Wait Time |
|---|---|---|
| 5:1 vinegar/water | Spray, then wipe in circles | 3 minutes |
| WD-40 | Apply to cloth first | Immediate |
| Commercial stripper | Use with ventilation | Per label |
Caution: Test cleaners on scrap glass first. For scratches, apply cerium oxide polish with a felt wheel. Always use grout removal tools parallel to edges to prevent further damage.
Conclusion
Black grout isn’t just trendy—it’s a game-changer for modern designs. A recent poll shows 89% of artists prefer it for bold contrast. Your glass mosaics will pop with these five keys: precise mixing, angled application, staged cleanup, full curing, and proper sealing.
Experiment safely—try epoxy for stained glass or additives for custom hues. MAC Glue users finish 72% faster, but always wear gloves and masks. Share your art online to inspire others.
Download our quick-reference checklist to nail every project. Got questions? Join forums where pros swap grout hacks. Now go transform those tiles!