Creating beautiful framed sea glass art is a rewarding DIY project that allows you to craft stunning, mosaic-like artwork using sea glass and epoxy resin. This comprehensive guide will walk you through the process, from preparing your materials to achieving a glossy finish.
You’ll discover why sea glass is a special material for artistic projects and learn how to enhance its natural beauty. To get started, you’ll need to gather essential materials, including a frame, adhesives, and protective supplies. For more inspiration and ideas on making sea glass art, you can explore resources like Heather Fegan’s blog on sea glass.
By following this step-by-step guide, you’ll be able to create a stunning piece of coastal-inspired artwork for your home. Whether you’re a beginner or have some crafting experience, this guide will help you achieve a professional-looking result.
The Beauty of Sea Glass Art
The beauty of sea glass art is not just in its visual appeal but also in the process of creating it, which can be therapeutic and fulfilling. As you engage in this creative activity, you’ll discover the unique charm of sea glass and the joy of transforming it into a stunning piece of art.
What Makes Sea Glass Special
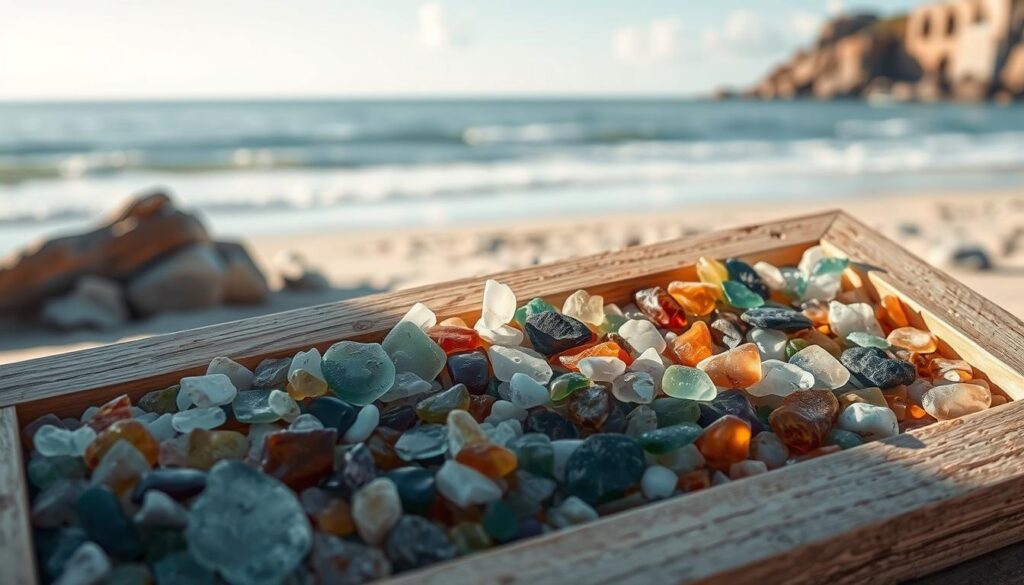
Sea glass is special because of its smooth texture and varied colors, which are a result of being weathered by the ocean. This process gives sea glass a unique character that is both beautiful and captivating.
Benefits of Creating Your Own Framed Art
Creating your own framed sea glass art offers numerous benefits, including:
- A therapeutic creative outlet that reduces stress and promotes mindfulness.
- The ability to add a personal touch to your home decor, reflecting your unique style.
- An opportunity to experiment with colors, patterns, and compositions, developing your artistic skills.
By creating your own sea glass art, you can bring a piece of the ocean into your home and enjoy the satisfaction of crafting something beautiful and meaningful.
Essential Materials for Your Sea Glass Project
Before diving into your sea glass art project, it’s crucial to prepare the necessary supplies. Having the right materials will ensure your artwork turns out as envisioned and lasts for years to come.
Sea Glass Collection and Preparation
The quality of your sea glass art begins with the sea glass itself. You’ll need a variety of pieces in different colors and shapes. Cleaning and preparing the glass is essential to remove any dirt or debris that might interfere with the adhesive or resin.
Frame and Background Options
Choosing the right frame and background can enhance the beauty of your sea glass art. Consider the color and style of your frame to complement the glass pieces. A well-chosen background can also add depth to your artwork.
Resin and Adhesive Supplies
Resin is a critical component in sea glass art, providing a protective layer and enhancing the glass’s natural beauty. Epoxy resin is preferred due to its clarity and durability. You’ll also need a reliable adhesive, such as glue specifically designed for glass and non-porous surfaces.
| Material | Description | Importance |
|---|---|---|
| Epoxy Resin | A clear, durable resin that protects and enhances sea glass | High |
| Glass Adhesive | A strong adhesive for securing sea glass pieces | High |
| Measuring Tools | For accurately mixing resin components | Medium |
| Stirring Tools | For mixing resin without introducing air bubbles | Medium |

Safety Precautions When Working with Resin
When working with resin, it’s crucial to take necessary safety precautions to avoid potential health risks and ensure a successful project outcome. Resin involves chemicals that can be hazardous if not handled properly.
Protective Gear Requirements
You should wear protective gear to safeguard against resin splashes and fumes. This includes gloves to prevent skin contact, safety glasses to protect your eyes, and a mask to avoid inhaling fumes.
Workspace Ventilation and Protection
Proper ventilation is essential when working with resin to prevent the accumulation of harmful fumes. Ensure your workspace is well-ventilated by setting up near open windows or using fans to create cross-ventilation.
- Cover your work surface completely with plastic sheeting to protect it from spills.
- Create a level working surface using a bubble level to ensure your resin cures evenly.
- Maintain a comfortable room temperature between 70-75°F (21-24°C) to prevent curing issues.
| Safety Measure | Purpose |
|---|---|
| Cross-ventilation | Directs fumes away from your breathing zone |
| Plastic sheeting | Protects work surface from resin spills |
| Level working surface | Ensures even curing of resin on the surface |
Preparing Your Sea Glass for the Project
To ensure your sea glass art looks its best, proper preparation is key. This involves cleaning and polishing your sea glass to remove any dirt or debris and optionally adding color to white or clear pieces.
Cleaning and Polishing Techniques
Begin by rinsing your sea glass under running water to remove loose dirt. For more thorough cleaning, use a soft-bristled brush and mild soap. To polish, you can use a rotary tool with a polishing attachment or simply buff the glass with a soft cloth.
Coloring White Sea Glass (Optional)
If you want to add some color to your project, you can dye white or clear glass using a mixture of food coloring and a clear-drying adhesive like Mod Podge. Mix colored water with an equal amount of glue until you achieve a glue-like consistency. Apply this mixture to your sea glass using a small paintbrush.
| Material | Purpose | Tips |
|---|---|---|
| Food Coloring | Adds color to sea glass | Mix with clear-drying adhesive |
| Mod Podge or White Glue | Acts as adhesive and sealant | Ensure glue-like consistency |
| Wax Paper or Silicone Mat | Prevents sticking during drying | Use under colored sea glass |
Place the colored sea glass on wax paper or a silicone mat to dry. For a more transparent effect, consider using alcohol inks. Allow the color to dry completely before handling.
Selecting and Preparing Your Frame
The frame you choose will serve as the foundation for your sea glass art, making its selection crucial.
Choosing the Right Size and Style
Choose a frame that complements the size and style of your sea glass collection. Consider the space where the art will be displayed and the overall aesthetic you wish to achieve.
Sanding and Cleaning the Frame
Before applying any finish, sand the frame to smooth out any rough edges or surfaces. Then, clean it thoroughly to remove any dust or debris.
Applying Base Coat or Primer
To enhance the frame’s appearance, apply a base coat of primer or paint. For wooden frames, use a wood primer. For other materials, a multi-surface primer is suitable. This step creates a solid background for your sea glass art.
| Frame Material | Recommended Primer |
|---|---|
| Wood | Wood Primer |
| Metal/Plastic | Multi-surface Primer |

Designing Your Sea Glass Pattern
Before you start arranging your sea glass, take a moment to plan your design. This step is crucial in creating a visually appealing piece of art that reflects your personal style.
Planning Your Layout on Paper
Start by sketching your design on paper. This doesn’t have to be a masterpiece; a simple outline will help you visualize the final product. Consider the size and shape of your frame, as well as the colors and textures of your sea glass pieces.
Creating Balanced Compositions
A balanced composition is key to a beautiful piece of art. You can achieve balance by distributing colors, textures, and shapes in a way that creates harmony. Experiment with different arrangements until you find one that feels right to you.
Popular Design Ideas for Beginners
Some popular design ideas for beginners include:
- Ombré or gradient arrangements that transition smoothly from one color to another.
- Geometric patterns like circles or spirals that provide a structured design.
- Coastal motifs such as waves or anchors that connect thematically with the sea glass material.
These designs are not only visually striking but also relatively simple to execute. You can also experiment with heart shapes or abstract patterns that focus on color relationships.
Framed Sea Glass Art: Step-by-Step Guide for Beginners
As you move forward with your project, arranging your sea glass on the frame is the first step. This process involves creatively placing your sea glass pieces to achieve a visually appealing design.
Arranging Sea Glass on the Frame
Begin by laying out your sea glass on the frame to visualize the final arrangement. Experiment with different patterns and distributions until you’re satisfied with the layout. Consider balancing larger pieces with smaller ones and varying the colors to create an aesthetically pleasing composition.
Securing Glass Pieces with Adhesive
Once you’re happy with your arrangement, it’s time to secure the sea glass pieces using a suitable adhesive. Apply a small amount of adhesive to the back of each piece and gently press it onto the frame. Make sure to follow the manufacturer’s instructions for the adhesive and let it dry completely.
Adding Decorative Elements
To enhance your sea glass art, consider adding decorative elements like sand, shells, or metallic accents. Sprinkle a thin layer of sand over the cured resin to create a beach-like texture, or use small shells to complement the sea glass colors. Ensure that these elements are securely attached using the same adhesive method.
Working with Epoxy Resin
To create stunning sea glass art, mastering the use of epoxy resin is essential. Epoxy resin is a critical component that not only protects your artwork but also enhances its visual appeal.
Mixing Resin and Hardener Properly
Properly mixing the resin and hardener is crucial for achieving the desired consistency and durability. Ensure you follow the manufacturer’s instructions for the correct ratio and mix thoroughly to avoid any uncured spots.
Pouring Techniques for Even Coverage
Pouring the resin mixture evenly is vital for a smooth finish. Start by pouring in the center and gently tilting the frame to allow the resin to flow outward. This technique helps prevent air bubbles from forming and ensures an even coat.
Removing Air Bubbles Effectively
After pouring the resin, you may notice small air bubbles rising to the surface. To remove them, gently pass a heat gun or torch over the resin. The heat will cause the bubbles to burst and disappear. For larger bubbles, you can use a toothpick to pop them or move them towards the edges of the artwork.
Some effective methods for removing air bubbles include:
- Using a heat gun or kitchen torch to cause bubbles to expand and pop.
- Exhaling gently over the surface for small areas, as the carbon dioxide in your breath helps break the surface tension of bubbles.
- Utilizing a toothpick or pin to pop larger bubbles that don’t respond to heat.
- Warming your resin components in a warm water bath before mixing to reduce bubble formation.
For more detailed instructions on creating sea glass art, you can visit this guide on making sea glass resin art.
Curing and Finishing Your Artwork
Curing and finishing are critical processes that transform your sea glass arrangement into a durable piece of art. These final steps require patience and attention to detail to achieve a professional result.
Optimal Curing Conditions
To ensure your resin cures properly, it’s essential to maintain optimal conditions. This typically means keeping your artwork in a dust-free environment at room temperature. Avoid exposing it to direct sunlight or moisture, as this can affect the curing process and lead to bubbles or uneven hardening.
Adding Final Touches and Polish
After your artwork is fully cured, inspect it for any imperfections on the surface. For minor issues, use progressive wet sanding with fine-grit sandpaper to restore clarity. Apply a final thin coat of resin as a “flood coat” to create a smooth, glass-like finish. For a professional finish, consider sanding and polishing the edges of your frame. You can also add hanging hardware that complements your frame style, as seen on our about page, and apply a UV-resistant clear spray if the piece will be displayed in direct sunlight.
Creative Variations to Try
Unleash your creativity and try these unique variations for your sea glass art. By incorporating different elements and techniques, you can create truly one-of-a-kind pieces.
Incorporating Shells and Sand
Enhance your sea glass art by adding shells and sand. This adds texture and depth to your artwork, creating a more immersive experience.
Geometric and Mosaic Patterns
Experiment with geometric and mosaic patterns using your glass pieces. This can add visual interest and create a more dynamic composition.
Adding Color with Tinted Resin
You can tint resin with transparent dyes or alcohol inks to add a pop of color. This allows for creative color effects that complement your sea glass.
| Technique | Description | Effect |
|---|---|---|
| Tinted Resin | Add color to resin with dyes or inks | Creates colored “seas” around glass pieces |
| Layering Resin | Layer different colored resins | Produces ombré or stratified effects |
| Metallic Pigments | Add metallic pigments to resin | Simulates sunlight reflecting on water |
Conclusion
Now that you’ve mastered the basics, the world of sea glass art is full of endless possibilities for you. Creating framed sea glass art combines the natural beauty of beach-found treasures with your personal creativity to produce unique, meaningful artwork. As you continue, you’ll find that each piece is entirely unique due to the individual characteristics of the glass pieces and your design choices.
Remember, practice makes perfect when it comes to resin art. Don’t be afraid to experiment with different colors, patterns, and techniques to create truly unique pieces. For more inspiration and techniques, you can explore related art forms like stained glass art.