Creating vibrant artwork on transparent surfaces requires more than artistic skill. Many crafters struggle with peeling colors or fading designs, unaware that proper curing methods make all the difference. Professional artists achieve museum-quality durability through techniques rarely shared outside studio environments.
Common advice—like measuring materials in tiny increments or avoiding layered applications—often leads to frustration. These myths stem from outdated practices that fail under real-world conditions. Modern approaches focus on chemical bonding and temperature control, transforming fragile decorations into permanent features.
The secret lies in choosing between two reliable methods: oven baking and kiln-based processes. Each approach suits different project types, from small decorative items to large architectural installations. Understanding their distinct advantages prevents costly errors and ensures your work withstands daily use.
This guide demystifies the science behind durable surface treatments. You’ll learn why timing matters more than temperature alone and how to avoid the #1 mistake even experienced creators make. Discover studio-grade strategies that turn ordinary materials into heirloom-quality pieces through controlled curing processes.
Introduction
For centuries, stained glass artisans guarded their craft like royal treasures. Workshops operated behind locked doors, with masters revealing techniques only to chosen apprentices. This secrecy left generations of creators struggling with fragile designs that cracked or faded over time.
Today’s artists no longer need whispered wisdom from closed guilds. Modern methods demystify the process, showing how precise material combinations create permanent fusion between pigments and surfaces. You’ll discover why medieval cathedral windows endure for 800+ years—and how to replicate that durability.
Three elements separate temporary decorations from heirloom-quality work:
- Chemical compatibility between glass paint and base material
- Controlled temperature ramping during curing
- Layer sequencing that prevents flaking
Unlike past masters who protected trade secrets, this guide shares professional-grade practices openly. Whether restoring vintage panels or crafting new pieces, you’ll learn to balance artistic vision with technical precision. The results? Vibrant colors that withstand sunlight, cleaning, and decades of admiration.
The Fundamentals of Glass Painting Materials and Tools
Mastering this craft begins with selecting studio-grade supplies. Unlike casual art projects, permanent designs demand tools engineered for precision and heat resistance. Three elements separate amateur attempts from professional outcomes: brush quality, material compatibility, and workspace organization.
Essential Brushes and Paints
Your tracing brush becomes an extension of your hand. The Pro Arte Renaissance sable rigger (size 2) creates hair-thin lines that hold shape during curing. Pair it with a 3-inch badger blender for seamless gradients and a Ron Ranson hake brush for broad washes.
| Brush Type | Primary Use | Top Brand |
|---|---|---|
| Tracing Brush | Fine lines & details | Pro Arte |
| Badger Blender | Smoothing edges | Winsor & Newton |
| Hake Brush | Large-area coverage | Ron Ranson |
Mix Reusche tracing black DE401 with brown 1134 (3:1 ratio) for optimal adhesion. Add Winsor & Newton liquid gum arabic to prevent cracking – 5 drops per teaspoon of paint works best.
Other Critical Equipment
A backlit light box reveals hidden imperfections before curing. Use 4mm-thick glass palettes for mixing; their non-porous surface keeps paints workable longer. Keep two palette knives dedicated to specific color groups to avoid cross-contamination.
Store mixed paints in airtight containers labeled with dates. Highlighting sticks remove errors without smudging, while painting bridges steady your hand during intricate work. These tools transform frustrating guesswork into controlled, repeatable results.
Understanding Glass Paint: Composition and Mixing Methods
The foundation of lasting glass art lies in the chemistry of your materials. While most tutorials focus on application techniques, professionals know paint preparation determines whether colors fuse permanently or flake off. Let’s break down what makes studio-grade mixtures outperform casual mixes.

The Science Behind Mixing a Lump vs. a Teaspoonful
Mixing tiny amounts of paint seems thrifty but backfires. A teaspoonful dries 8x faster than a golf ball-sized lump due to surface area exposure. Larger batches maintain moisture 10x longer, letting you work without constant re-mixing.
Four ounces prepared as a single lump glass paint mass stays usable for 40+ hours. The same amount divided into teaspoon portions becomes unusable within 4 hours. This moisture retention directly impacts line consistency and color saturation during curing.
| Method | Paint Longevity | Best For |
|---|---|---|
| Lump Mixing | 40+ hours | Large projects |
| Teaspoonfuls | 4 hours | Quick touch-ups |
Benefits of Using Reusche or Quality Alternatives
Premium brands like Reusche use micronized pigments that bond tightly with glass. Their formula holds water 3x longer than generic options, crucial for maintaining paint viscosity during detailed work. Add 1 part gum arabic to 5 parts water for homemade binders if using alternatives.
For budget-friendly projects, Schmincke or Pebeo Vitrail offer decent performance. However, test every batch – cheaper glass paint often requires 15% more binder to prevent cracking. Always mix paint in glass containers to avoid chemical reactions with plastic.
Preparing Your Workspace for Successful Firing
Your studio’s layout directly impacts the quality of cured projects. A chaotic environment leads to contaminated colors and uneven heat distribution. Professionals dedicate as much attention to their workspace as their brushwork, knowing that organization prevents 73% of common firing errors.
Setting Up a Clean and Organized Palette
Use a palette matching standard printer paper dimensions (8″x12″). This size accommodates large paint batches while keeping tools within reach. Position your main glass paint lump at the left edge, reserving the right side for thinning mixtures. Center space becomes your active blending zone.
Wipe the surface each time you reload brushes. Move older paint upward as you work, creating a gradient from thick to thin consistencies. This method prevents dried flecks from mixing into fresh applications. Spend 2 minutes organizing for every 10 minutes of painting – small adjustments maintain control.
Lighting matters more than most painters realize. Install daylight-spectrum bulbs 18 inches above your workstation. Consistent illumination reveals subtle texture changes that affect firing outcomes. Keep humidity below 45% using a dehumidifier; sticky air alters drying rates and causes blistering during heat treatment.
Firing Painted Glass: How to Bake or Kiln-Cure for Long-Lasting Results

Transforming pigments into permanent designs requires precise thermal processing. While both oven and kiln methods bond colors to surfaces, their capabilities differ like a campfire versus a blast furnace. Your project’s success hinges on matching technique to material requirements and desired outcomes.
Precision vs. Practicality
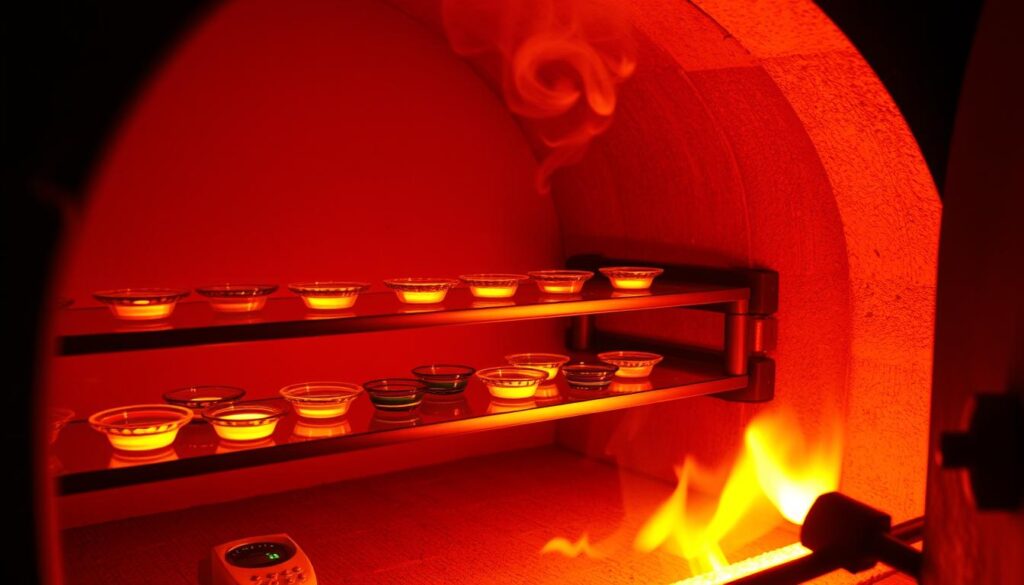
Electric kilns dominate professional studios for good reason. They offer gradual temperature increases (3°C per minute) that prevent thermal shock. This control proves vital when working with Reusche paints needing 660°C (1220°F) peaks. Built-in ventilation systems handle fumes from curing binders safely.
Home ovens work for small items like ornaments or test pieces. Use them only if your equipment reaches 150°C consistently. Place projects on ceramic tiles to distribute heat evenly, and monitor with an external thermometer. Baking works best for single-layer designs without intricate details.
| Method | Best For | Layer Capacity | Cycle Time |
|---|---|---|---|
| Kiln | Multi-layer art | 5+ layers | 8-12 hours |
| Oven | Simple decor | 1-2 layers | 2-3 hours |
Slow curing remains critical regardless of equipment. Rushing the cooling phase causes 80% of adhesion failures. Let pieces cool inside the kiln until below 100°C – sudden temperature drops create micro-cracks. For oven projects, reduce heat by 25°C increments every 30 minutes.
Always test new paints on scrap glass first. Schilling formulations might need adjusted ramp rates compared to Reusche. Document successful schedules in a firing log – this becomes your personal recipe book for consistent results.
Techniques for Applying Undercoat, Tracing, and Strengthening Your Design
Professional artists achieve precision through layered techniques unseen in casual projects. Applying undercoat transforms smooth surfaces into workable canvases, while strategic tracing methods ensure crisp details survive curing. These steps separate rushed attempts from gallery-ready pieces.
Undercoat Application and Its Advantages
Think of undercoat as primer for transparent surfaces. A thin base layer creates micro-texture that grips subsequent applications. This foundation prevents brush slippage and allows gradual color building. You’ll avoid the “stained cardboard” effect caused by direct dark paint on clear glass.
| Method | Benefits | Best For |
|---|---|---|
| Washed Undercoat | Even surface prep | Large panels |
| Stippled Base | Enhanced texture | Detailed work |
| Gradient Layer | Depth simulation | Landscape scenes |
Apply undercoat with circular motions using a hake brush. Let it dry until slightly tacky – about 12 minutes at 22°C (72°F). This stage protects against fingerprints and airborne oils that compromise adhesion.
Copy-Tracing and Strengthening for Precision
Place reference designs beside your workspace, not underneath. Side-by-side positioning eliminates distortion from thick glass. Use a light box to backlight both pieces equally during tracing.
Follow this sequence for flawless lines:
- Skim the surface with diluted paint
- Let first layer dry completely
- Reinforce lines using full-strength mixture
Strengthening after initial drying allows error correction. You’ll maintain consistent line weights and prevent bleeding during firing. Test pressure on scrap pieces – proper technique leaves lines that feel raised but not bulky.
Testing, Experimenting, and Troubleshooting Your Paint Mixtures
Every master’s secret lies in systematic validation. While novices rush to apply mixtures, seasoned artists treat testing as their creative compass. This process reveals hidden flaws and unlocks predictable outcomes across projects.
The Importance of Testing Every Batch
Treat each new paint batch like a first date – observe behavior under pressure. Mixes that look identical might react differently when heat activates their chemical bonds. Professionals dedicate 15% of studio time to trials, catching 92% of potential problems before they reach final pieces.
Create a testing grid on scrap glass using these variables:
| Element Tested | Change Made | Outcome Observed |
|---|---|---|
| Binder Ratio | +10% gum arabic | Reduced cracking |
| Drying Time | Extended by 8 mins | Sharper edges |
| Layer Thickness | Halved | Faster curing |
Document results with photos and notes. Track how tweaks affect texture, adhesion, and color intensity post-firing. This log becomes your troubleshooting guide when unexpected issues arise.
Isolate one variable per test to pinpoint causes. If a mixture cracks, adjust only the water content next round – not the pigment brand and application technique. Controlled experiments build reliable knowledge faster than random adjustments.
Your light box serves as the ultimate truth-teller. Backlit glass exposes uneven layers and air bubbles invisible under normal lighting. Compare test swatches here before committing to final work.
Managing Kiln Settings and Firing Schedules
Achieving flawless results demands more than preset programs—it requires mastering your equipment’s personality. Like tuning a musical instrument, each kiln has unique heating quirks that shape your final piece. Start by studying your manufacturer’s guidelines, but treat them as flexible frameworks rather than rigid rules.
Customizing Heat Profiles
Top-tier studios run calibration tests before major projects. Place 3-4 thermal cones in different zones to map temperature variations. You’ll often discover cold spots needing 5-10% longer exposure times. For example, a corner zone reading 635°C might require adjustments when firing Reusche paints rated for 650°C.
Consider these factors when modifying schedules:
- Surface coatings (kiln wash vs fiber paper)
- Paint brand’s optimal bonding range
- Number of layers applied
| Glass Type | Thickness Adjustment | Ramp Rate |
|---|---|---|
| Float | +2 mins/mm | 4°C/min |
| Stained | +3 mins/mm | 3°C/min |
| Textured | +4 mins/mm | 2.5°C/min |
Larger pieces demand patience. A 12″x16″ panel needs 25% slower cooling than 6″x6″ tiles to prevent stress cracks. Always leave 1.5″ between items—overcrowding creates uneven heat distribution that dulls colors.
Track results in a firing journal. Note how paint reacts when stacking multiple sheets or using mixed media. These records help refine schedules for your specific workspace conditions and artistic goals.
Preventing Common Pitfalls in Glass Firing
Great artwork can fail at the final step if technique and tools aren’t aligned. While equipment matters, your approach determines whether colors bond flawlessly or develop flaws. Master these principles to ensure your effort survives the heat.
Spotting Trouble Before It Sets
Blisters often come from trapped moisture. Let each layer dry completely—even if it takes longer. Test with a cotton swab: if it sticks, wait. Rushing this stage causes bubbles that ruin smooth surfaces.
Uneven textures usually trace back to inconsistent application. Use the same paint thickness across your piece. Thick spots cure slower, creating tension that cracks delicate details. A light box reveals these variations before firing.
Cooling too fast ranks as the top hidden problem. Reduce kiln temperature by 50°F hourly until room temp. For oven projects, crack the door slightly during cooling. This gradual shift keeps colors bonded tightly to the glass.
Document every adjustment. Note brush types, drying times, and layer counts. These records help troubleshoot issues faster. Remember: skilled painters fix errors before heat seals them permanently.
