Creating art from glass is a rewarding and versatile craft. Whether you’re designing jewelry, decor, or functional items, the possibilities are endless. This art form is accessible to beginners and experts alike, offering a chance to explore creativity in unique ways.
Understanding the basics is key. Techniques like hot, warm, and cold working allow you to shape and mold glass into intricate designs. Detail-oriented projects often rely on smaller tools, making precision easier to achieve.
Safety is a top priority. Proper workspace setup and protective gear are essential. Additionally, the annealing process in a kiln ensures your finished pieces are durable and stress-free. With practice, you’ll master the process and create stunning works of art.
Introduction to Sculpting with Glass Rods and Stringers
The art of shaping glass has evolved over centuries, blending tradition with modern techniques. Today, glass art encompasses a wide range of methods, from ancient practices to cutting-edge innovations. Whether you’re a beginner or an experienced artist, understanding the basics is essential.
There are three main categories of glass working: hot glass, warm glass, and cold glass. Hot glass involves temperatures above 2000°F, allowing for fluid shaping and molding. Warm glass uses kiln-forming techniques, while cold glass is worked at room temperature. Each method offers unique possibilities for design.
One critical aspect of all these techniques is the annealing process. This step ensures your finished pieces are durable and stress-free. Without proper annealing, glass can crack or break over time. Mastering this step is key to creating long-lasting art.
Historically, glass art has roots in Mesopotamian murrini and Venetian innovations. Today, it’s used in everything from jewelry components to decorative elements. Modern artists often choose between torchworking and kiln-based methods, each offering distinct advantages.
- Torchworking: Ideal for small, detailed projects like beads and pendants.
- Kiln-based methods: Perfect for larger, more complex designs.
When selecting materials, COE compatibility is crucial. This ensures your glass pieces expand and contract at the same rate, preventing cracks. Additionally, reactive glass properties, as outlined in Bullseye charts, can add unique effects to your work.
Exploring these techniques opens up a world of creativity. Whether you’re drawn to hot glass or prefer the precision of cold working, there’s a way to bring your vision to life. Start experimenting and discover the endless possibilities of glass art.
Essential Tools and Materials for Glass Sculpting
Mastering glass art starts with the right tools and materials. Whether you’re a beginner or an experienced artist, having the proper equipment ensures precision and creativity in your work. From rods and stringers to specialized molds and torches, each tool plays a vital role in bringing your vision to life.
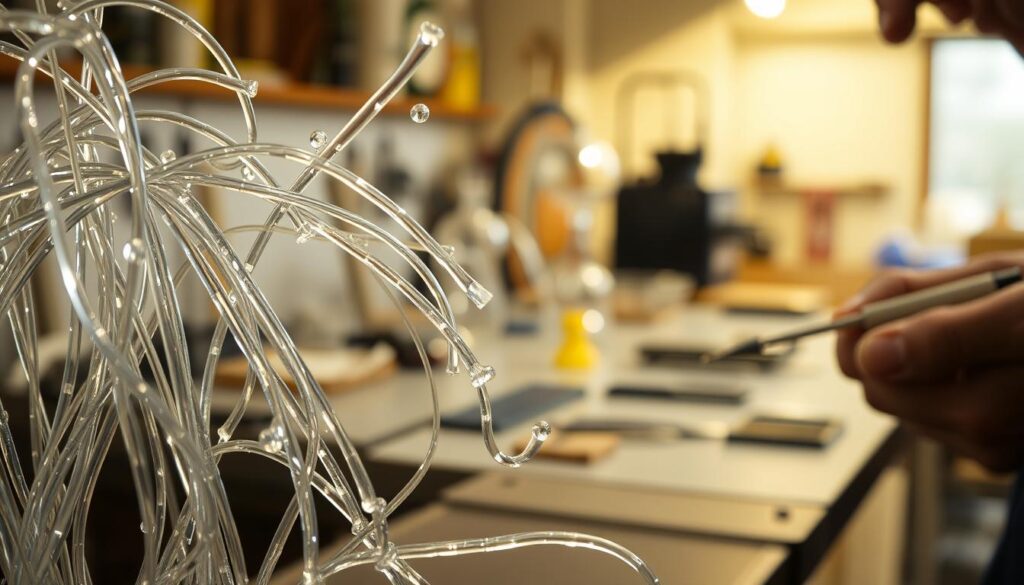
Glass Rods and Stringers
Rods and stringers are fundamental for creating intricate designs. These materials come in various colors and sizes, allowing you to experiment with patterns and textures. Specialty glasses, like Bullseye’s reeded/prismatic sheets, add unique effects such as bubble patterns to your work.
Proper storage is crucial to prevent contamination. Keep your rods and stringers in a clean, dry place, away from dust and moisture. Reactive glasses, like French Vanilla Gold Purple, offer stunning color shifts when heated, adding depth to your creations.
Other Necessary Tools
Beyond rods and stringers, you’ll need a variety of tools to shape and refine your designs. Blowpipes, mandrels, and tungsten picks are essential for detailed work. A kiln is indispensable for annealing, ensuring your pieces are durable and stress-free. Hot Shot models are popular for their versatility across techniques.
When choosing a torch, consider your project size. Micro Burners are ideal for small, detailed work, while oxygen-propane setups handle larger pieces. Molds also play a key role—ceramic molds are durable, while refractory fiberboard offers flexibility for complex designs.
By equipping yourself with the right tools and materials, you’ll unlock endless possibilities in glass art. Start experimenting and watch your creativity take shape.
Setting Up Your Workspace
A well-organized workspace is the foundation of successful glass art creation. Proper setup ensures efficiency, creativity, and most importantly, safety. Start by designating separate zones for hot and cold work areas. This prevents accidents and keeps your tools and materials organized.
Invest in a kiln with Cool-Touch technology to minimize burn risks. This feature is especially useful for beginners. Ensure your workspace has adequate ventilation to handle fumes from fusing or fuming processes. Proper air flow protects your health and maintains a comfortable environment.

Choose fireproof surfaces for your workstations. This adds an extra layer of safety when handling high temperatures. An ergonomic layout is also crucial. Arrange your tools and components in a way that minimizes strain and maximizes accessibility.
Finally, don’t forget emergency equipment. Keep fire extinguishers and eye wash stations within easy reach. These precautions ensure you’re prepared for any unexpected situations. With the right setup, your workspace becomes a hub of creativity and productivity.
Basic Techniques for Sculpting with Glass Rods and Stringers
The process of heating and shaping glass is both an art and a science. By mastering these fundamentals, you can create intricate designs and stunning effects. Whether you’re working on a small piece or a larger project, understanding the techniques is essential.
https://www.youtube.com/watch?v=MbYuEgC7U_0&pp=0gcJCfwAo7VqN5tD
Heating and Shaping Glass
Proper heating is crucial for manipulating glass effectively. Different temperature zones allow for optimal rod manipulation. For example, a steady flame at 2000°F ensures smooth shaping without cracking. Use spiral wrapping methods to maintain tension control while working.
Layering transparent and opal glasses can add depth to your designs. Combing techniques with tungsten picks help create unique textures. For bubbles, follow a squeeze schedule of 300°F/hr to 1220°F hold. This ensures even distribution and prevents stress in the finished piece.
Creating Detailed Patterns
Detailed patterns are a hallmark of advanced glass work. Start by experimenting with 1mm and 2mm stringers to see which suits your project. Smaller stringers are ideal for fine lines, while thicker ones add boldness to your design.
Reeded or prismatic glass can create stunning bubbles and light effects. Use these materials to enhance the visual appeal of your work. Below is a comparison of 1mm vs. 2mm stringer performance:
| Stringer Size | Best Use | Performance |
|---|---|---|
| 1mm | Fine lines, intricate details | High precision, delicate handling |
| 2mm | Bold patterns, larger designs | Durable, easier to handle |
By combining these techniques, you can elevate your glass projects to the next level. Experiment with different methods to discover what works best for your creative vision.
Advanced Techniques for Detail Work
Taking your glass art to the next level requires mastering advanced techniques. These methods allow you to create intricate patterns, add depth, and bring your design ideas to life. Whether you’re working on small details or larger projects, these strategies will elevate your work.

Incorporating Color and Texture
Adding color and texture can transform your glass pieces. Use reactive layer stacking with spray adhesives to create vibrant, multi-dimensional effects. This technique ensures layers bond securely, preventing cracks during the firing process.
Murrini alignment is another powerful method. By carefully arranging mosaic patterns, you can achieve stunning visual effects. Kristien Berghs’ cats-eye murrini tutorial is a great resource for mastering this approach.
Combining Techniques for Complex Designs
Complex designs often require combining multiple techniques. Vitrograph cane pulling, for example, allows you to create unique patterns by stretching molten glass. This method is ideal for adding intricate details to your work.
Multi-stage fuse schedules are essential for dimensional elements. By carefully controlling the kiln temperature, you can achieve precise shapes and textures. Stephen Rolfe Powell’s vessel layering approach is a great example of this method in action.
Finally, coldworking integration ensures precision edges and smooth finishes. This step adds a professional touch to your completed pieces, making them stand out.
Safety Tips for Glass Sculpting
Ensuring safety while working with glass is essential for a smooth creative process. By following these guidelines, you can protect yourself and focus on your art without worry.
Start by wearing the right protective gear. ANSI-approved eyewear shields your eyes from harmful debris. Heat-resistant aprons and gloves protect your hand and body from burns. For respiratory safety, use an N95 mask to prevent silicosis, a lung condition caused by inhaling fine particles.
Here are additional measures to keep in mind:
- Keep a first aid kit nearby for treating thermal burns. Cool the affected area immediately and seek medical attention if necessary.
- Handle frit carefully to reduce airborne particles. Use a damp cloth to clean surfaces and minimize dust.
- Ensure proper ventilation in your kiln room. Follow CFM (cubic feet per minute) calculations to maintain air quality.
- Use Class D fire extinguishers for metal fires. Keep them accessible in case of emergencies.
- Familiarize yourself with emergency shutdown procedures for your equipment. This prevents accidents during unexpected situations.
Below is a table outlining recommended ventilation standards for kiln rooms:
| Room Size (sq. ft.) | Required CFM |
|---|---|
| 100 | 150 |
| 200 | 300 |
| 300 | 450 |
By prioritizing safety, you can enjoy your glass art journey while minimizing risks. Always stay prepared and follow these tips to create in a secure environment.
Conclusion
Exploring the world of glass art opens doors to endless creativity and innovation. Whether you prefer lampworking or kiln-forming, each technique offers unique possibilities for your design projects. Lampworking is ideal for small, detailed work, while kiln-forming excels in larger, complex pieces.
Experiment with Bullseye reactive glasses to add vibrant colors and textures to your craft. Their unique properties can elevate your work, making it stand out. For continued learning, check out Bullseye’s blog and classes to refine your techniques.
Always prioritize safety by scaling your projects appropriately. Start small and gradually take on more complex designs as you gain confidence. Finally, share your creations online to inspire others and showcase your progress. The journey of glass art is as rewarding as the finished pieces themselves.