Creating decorative outdoor pieces is a rewarding DIY project that combines functionality and beauty. Crafting a wind chime using glass adds a unique touch to your porch, blending artistry with practicality.
These sun-catching, melodic creations are perfect for adding charm to your outdoor space. Using durable materials like tempered glass and weather-resistant components ensures longevity, even in changing conditions.
This project is beginner-friendly, offering a step-by-step process that’s easy to follow. Whether you’re new to crafting or an experienced DIY enthusiast, you’ll find this guide helpful in creating a stunning piece for your home.
Introduction to Stained Glass Wind Chimes
Wind chimes have long been cherished for their soothing melodies and artistic appeal. Across civilizations, they’ve symbolized peace and a deep connection with nature. Today, modern DIY versions blend artistry with functionality, creating pieces that are both decorative and meaningful.
Historically, wind chimes were used in various cultures as protective charms or musical instruments. Their gentle sounds were believed to ward off negative energy and bring harmony. In contemporary settings, they’ve evolved into a popular choice for enhancing outdoor space decor.
One of the standout features of glass wind chimes is their unique acoustic properties. Unlike metal or bamboo, glass produces a delicate, resonant tone that adds a calming atmosphere to your surroundings. The use of stained glass also introduces vibrant colors and prismatic light effects, making them visually stunning.
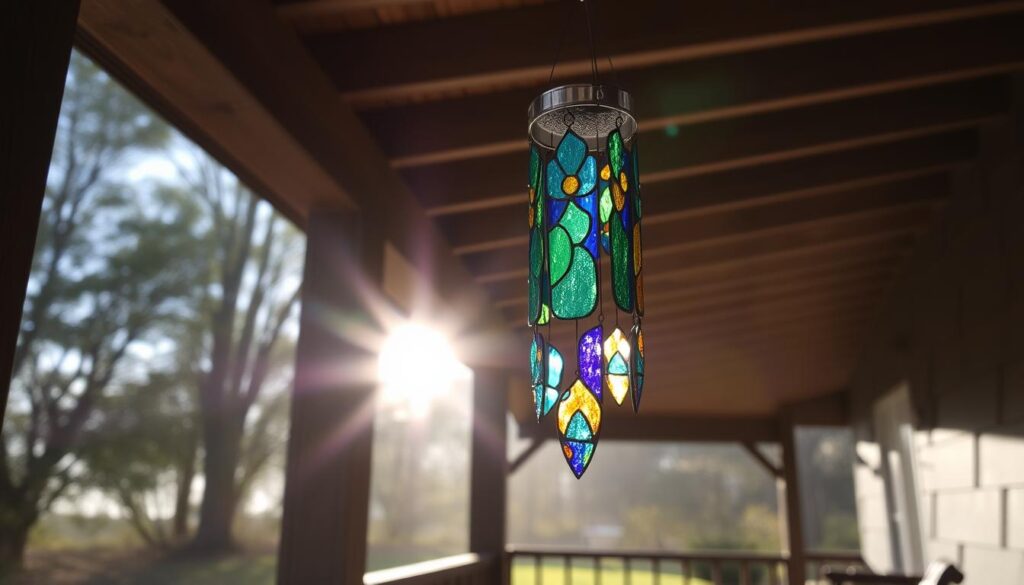
When placing your wind chime, consider areas with gentle breezes to maximize both sound and visual impact. Porches, gardens, and patios are ideal spots. For more inspiration, explore stained glass wind chimes DIY ideas to create a piece that reflects your style.
Whether you’re drawn to their historical significance or their modern aesthetic, wind chimes are a timeless addition to any home. Their combination of artistry and functionality makes them a perfect project for enhancing your outdoor decor.
Why Choose Stained Glass Wind Chimes?
The gentle clinking of glass creates a soothing ambiance that’s hard to resist. These chimes not only add beauty to your space but also offer a range of benefits that make them a standout choice for outdoor decor.
One of the key advantages is the ability to customize colors to match your existing decor. Whether you prefer bold hues or soft pastels, stained glass allows you to create a piece that reflects your personal touch.
Beyond aesthetics, the therapeutic benefits of glass chimes are undeniable. The delicate sounds they produce can reduce stress and create a calming atmosphere. It’s like having a natural stress reliever right on your porch.
- Durability: Properly sealed stained glass withstands weather elements, ensuring your chime lasts for years.
- Unique Gift: These chimes make thoughtful presents for housewarmings or special occasions.
- Eco-Friendly: Repurposing glass materials adds an environmentally conscious element to your project.
Whether you’re a seasoned crafter or new to diy projects, stained glass chimes offer a rewarding experience. They combine artistry, functionality, and personal expression into one beautiful creation.
Materials Needed for Your Project
Gathering the right materials is the first step to crafting a beautiful outdoor piece. Having the correct supplies ensures your project is both functional and visually appealing.
Glass Pieces and Tools
Start by selecting compatible glass pieces. Options like cabochons, sea glass, or recycled bottle glass work well. If you’re a beginner, pre-cut pieces are a great choice to avoid the complexity of specialized glass cutters.
Safety is crucial when handling glass. Always wear cut-resistant gloves and protective eyewear. These precautions protect you from sharp edges and flying shards.
Fishing Line and Other Essentials
For hanging your glass pieces, a 6lb fishing line is ideal. It’s strong enough to hold the weight while remaining nearly invisible. Pair it with 26-gauge steel wire or 16-18 gauge aluminum wire for structural support.
Adhesives like Gorilla Glue or E6000 are excellent for securing components. They’re weather-resistant, ensuring your creation withstands outdoor conditions. Round-nose pliers and wire cutters are also essential for precise assembly.
By choosing the right materials, you’ll create a durable and stunning piece that enhances your outdoor space.
Preparing Your Workspace
Setting up a dedicated workspace ensures a smooth and safe crafting experience. Start by choosing a flat surface with good lighting. This helps you see details clearly and reduces the risk of errors.
Keep glass shards contained by using a tray or mat. This simple step enhances safety and prevents accidents. A clean, organized area also makes it easier to focus on your project.
Your workspace should have enough space to maneuver chime components comfortably. A table or desk with ample room allows you to spread out materials and tools. This setup minimizes clutter and improves efficiency.
Organize glass pieces by color or size for easy access. Use small containers or trays to sort them. This system saves time and ensures you can find what you need quickly.
Ensure proper ventilation when working with adhesives. Open windows or use a fan to maintain airflow. This prevents inhaling fumes and keeps your workspace comfortable.
If you have children or pets, take extra precautions. Store sharp tools and glass pieces out of reach. This keeps everyone safe while you work.
For multi-session projects, plan your time wisely. Set aside specific hours to avoid rushing. This approach ensures you can enjoy the process without stress.
Step 1: Selecting and Preparing Glass Pieces
Starting with the right glass pieces sets the foundation for a stunning project. Whether you choose fish bowl glass or tempered cabochons, the quality of your materials matters. Smooth any sharp edges with a grinder to ensure safety and a polished finish.
When selecting your glass, consider the size and thickness. A thickness of 3-5mm is ideal for durability and sound quality. Thicker pieces produce deeper tones, while thinner ones create lighter, delicate sounds.
Think about colors and how they interact. Use color theory principles to create visual harmony. Complementary colors can make your project pop, while monochromatic schemes offer a more subtle elegance.
Cleaning your glass is essential for optimal light refraction. Use a mild glass cleaner and a soft cloth to remove any dust or smudges. This step ensures your finished piece sparkles in the sunlight.
Sort your glass pieces by size and weight for balanced distribution. This prevents one side of your chime from being heavier than the other. If you encounter irregularly shaped pieces, adjust their placement to maintain equilibrium.
| Thickness (mm) | Sound Quality | Best Use |
|---|---|---|
| 3 | Light, delicate | Small chimes |
| 4 | Balanced | Medium chimes |
| 5 | Deep, resonant | Large chimes |
By carefully selecting and preparing your glass, you’ll create a piece that’s both beautiful and functional. This step ensures your project is ready for the next stages of assembly.
Step 2: Wrapping the Glass Pieces
Mastering the art of wrapping glass pieces ensures both durability and visual appeal. This step involves securing each piece with wire to create a balanced and harmonious design. Proper technique prevents damage while enhancing the overall look of your project.

Techniques for Wrapping
Using 26-gauge wire, you can create a “quick star” pattern that holds the glass securely. Start by looping the wire around the top of the piece, ensuring even tension. This prevents fractures and maintains the integrity of the glass.
For angular pieces, focus on wrapping the corners tightly. Round or stone-like shapes require a more even distribution of wire. Adjust the tension as you work to avoid over-tightening, which can cause cracks.
- Decorative vs. Functional: Choose between exposed wire for a modern look or hidden wraps for a cleaner finish.
- Securing Methods: Use small knots or twists at the bottom to keep the wire in place.
- Troubleshooting: If the wire slips, rewrap and secure with additional twists.
Consider the aesthetic impact of exposed wire elements. They can add a unique touch to your design, especially when paired with colorful stone accents. Experiment with different styles to find what suits your vision best.
Step 3: Creating the Wind Chime Strands
Assembling the strands is a crucial step in bringing your project to life. This process ensures your piece is both functional and visually balanced. Start by attaching the glass pieces to the fishing line with precision.
Leave about 6 inches of excess fishing line at the line top for adjustments. Use double knots and apply a small amount of adhesive to secure them. Let the glue dry completely before moving to the next step.
Spacing and Weight Distribution
Proper spacing between glass pieces enhances acoustic resonance. Follow these tips for optimal results:
- Use a spacing formula to ensure even distribution.
- Balance the weight across all strands for smooth hanging.
- Test each strand’s durability before final assembly.
For invisible knots, use clear adhesives to maintain a clean look. Calculate the length of each strand based on the frame diameter. This ensures your piece hangs evenly and produces the desired sound.
Step 4: Designing the Frame
Designing a sturdy frame is essential for balancing your outdoor creation. The frame not only supports the glass pieces but also ensures the chime hangs evenly. Choosing the right materials and techniques will enhance both durability and visual appeal.
Choosing the Right Wire for the Frame
For a durable frame, 16-gauge aluminum wire is highly recommended. It’s lightweight yet strong enough to support the weight of the glass pieces. This material also resists rust, making it ideal for outdoor use.
Consider the size of your frame in relation to the hanging space. A larger frame may require thicker wire or additional reinforcement. Smaller frames can use thinner wire, but ensure it’s sturdy enough to hold the strands securely.
- Alternative Materials: Copper offers a rustic look, while stainless steel provides extra durability.
- Decorative Twisting: Add visual interest by twisting the wire into unique patterns.
- Structural Reinforcement: Use crossbars or additional loops for heavy strands.
- Weatherproofing: Apply a clear sealant to protect metal components from the elements.
| Material | Pros | Cons |
|---|---|---|
| Aluminum | Lightweight, rust-resistant | Less decorative |
| Copper | Rustic aesthetic | Requires maintenance |
| Stainless Steel | Highly durable | Heavier weight |
By selecting the right wire and techniques, you’ll create a frame that’s both functional and visually appealing. This step ensures your project is ready for the final assembly.
Step 5: Assembling the Wind Chime
Bringing all the elements together is the final step to completing your outdoor masterpiece. Attach the strands to the frame using triple knots and a dab of adhesive for extra security. This ensures your creation stays intact even in breezy conditions.
Consider the layout of your strands. A symmetrical design offers a classic, balanced look, while an asymmetrical approach can add a modern, artistic flair. Both styles work well, so choose one that complements your outdoor space.
Acoustic tuning is another important factor. Adjust the positioning of the strands to achieve the desired sound. Longer strands produce deeper tones, while shorter ones create higher pitches. Experiment until you find the perfect harmony.
- Weight-Bearing Tests: Ensure the frame can support the weight of all the glass pieces. Add reinforcements if needed.
- Visual Balance: Step back and assess the overall look. Make adjustments to ensure the chime hangs evenly.
- Temporary Mockups: Use a hook to hang the chime temporarily. This allows you to test its functionality and appearance before finalizing.
By carefully assembling your wind chime, you’ll create a piece that’s both beautiful and functional. This step ensures your project is ready to enhance your outdoor space with its melodic charm.
Step 6: Adding the Hanging Hook
Crafting a secure hook ensures your creation hangs perfectly. Use the remaining aluminum wire to shape a sturdy hook. Test its weight capacity to ensure it supports your project without bending or breaking.
Start by calculating the load-bearing requirements. A thicker wire or reinforced design may be necessary for larger pieces. This step prevents accidents and ensures long-term durability.
Consider adding decorative elements to the hook. Twisting the wire or incorporating beads can enhance its visual appeal. These details make your project stand out even more.
- Anti-Sway Techniques: Add a rubber stopper or silicone pad to reduce movement in windy conditions.
- Multiple Hooks: For larger chimes, use two or more hooks to distribute weight evenly.
- Weatherproofing: Apply a clear sealant to metal contact points to prevent rust.
| Hook Type | Best Use | Weight Capacity |
|---|---|---|
| Single Hook | Small to Medium Chimes | Up to 2 lbs |
| Double Hook | Large Chimes | Up to 5 lbs |
By carefully designing and testing the hook, you’ll ensure your piece hangs securely and looks polished. This step completes your project, ready to enhance your outdoor space.
Step 7: Final Adjustments and Testing
Ensuring your creation performs flawlessly requires careful testing and adjustments. Start by hanging your piece in a light breeze to evaluate its sounds and movement. Avoid concrete areas during testing to prevent damage if it falls.
Assess the sound quality by listening for clarity and resonance. Adjust the length of the strands to fine-tune the pitch. Longer strands produce deeper tones, while shorter ones create higher pitches.
Test the wind resistance by observing how the chime moves in stronger gusts. If it sways too much, add a rubber stopper or silicone pad to dampen vibrations. This ensures stability and reduces wear over time.
- Seasonal Maintenance: Inspect your chime regularly for wear or damage. Clean glass pieces to maintain their shine.
- Troubleshooting Silent Chimes: Check for tangled strands or loose knots. Reattach any detached pieces securely.
By making these final adjustments, you’ll ensure your project is both beautiful and functional. This step guarantees your creation is ready to enhance your outdoor space with its melodic charm.
Tips for a Successful Project
Ensuring a smooth crafting process starts with prioritizing safety. Whether you’re a beginner or an experienced crafter, taking precautions makes the project more enjoyable and secure. A safe workspace not only protects you but also ensures your creation turns out beautifully.
Essential Safety Precautions
Working with glass pieces requires attention to detail and care. Always wear gloves and protective eyewear to avoid injuries. If you’re hanging your project, choose a tree branch over hard surfaces to prevent damage if it falls.
- First Aid Protocols: Keep a first aid kit nearby for minor cuts or scrapes. Clean wounds immediately and apply bandages as needed.
- Safe Disposal: Dispose of glass shards in a sealed container to prevent accidents. Label it clearly to alert others.
- Child-Safe Hanging Heights: Hang your project at a height that’s out of reach for children. This prevents accidental contact or injuries.
- Storm Preparedness: Bring your creation indoors during severe weather to avoid damage. Use a secure storage area to keep it safe.
- Long-Term Inspections: Regularly check for wear or loose components. Tighten knots and replace damaged pieces to maintain durability.
By following these tips, you’ll ensure your project is both fun and safe. Taking these steps not only protects you but also enhances the longevity of your creation.

Creative Variations for Your Wind Chime
Personalizing your outdoor decor can be both fun and meaningful. With a few creative ideas, you can transform your space into a reflection of your style. Experiment with different materials and designs to make your project truly unique.
Start by exploring alternative materials like sea glass or recycled bottle glass. These options add texture and character to your creation. Incorporate colored beads for a playful touch that catches the light beautifully.
Consider themed colors to match your aesthetic. Oceanic palettes with blues and greens create a calming vibe. Sunset hues like oranges and pinks add warmth, while jewel tones bring a touch of elegance.
Mixed-media incorporations can elevate your design. Use driftwood or shells for a natural, coastal feel. These elements blend seamlessly with glass pieces, adding depth and interest.
- Holiday-Specific Designs: Create festive chimes with red and green tones or snowflake patterns.
- Memorial Chimes: Embed keepsakes like charms or engraved pieces for a sentimental touch.
- Kinetic Elements: Add moving parts like spinning beads or dangling accents for extra visual appeal.
This diy project allows you to express your creativity while enhancing your outdoor space. Whether you prefer a minimalist look or a bold statement, the possibilities are endless.
Where to Hang Your Stained Glass Wind Chime
Choosing the perfect spot for your creation enhances its beauty and functionality. The location you select can significantly impact its performance and visual appeal. Ideal spots include tree branches, pergolas, and covered porches, which provide both stability and aesthetic value.
Consider the microclimate of your area. Salt air and humidity can affect durability, so choose materials and locations that withstand these conditions. Sun exposure also plays a role in color preservation. Too much direct sunlight may fade vibrant hues over time.
Noise pollution mitigation is another factor. Hang your piece in areas with gentle breezes to create soothing sounds without overwhelming your outdoor space. Avoid spots near busy roads or loud machinery to maintain a peaceful ambiance.
Architectural complementing positions add harmony to your decor. Place your chime near elements like garden arches or patio railings to create a cohesive look. This approach enhances the overall aesthetic of your porch or yard.
Neighborhood etiquette is also important. Ensure your chime’s sound level is considerate of nearby homes. A well-placed piece adds charm without causing disturbances.
| Location | Benefits | Considerations |
|---|---|---|
| Tree Branches | Natural, rustic look | Ensure branch strength |
| Pergolas | Shaded, elegant placement | Check for structural support |
| Covered Porches | Protected from harsh weather | Measure space for optimal sound |
By thoughtfully selecting the right spot, you’ll ensure your project enhances your outdoor space with both visual and acoustic appeal. This step completes your creation, ready to bring joy and beauty to your surroundings.
Maintaining Your Stained Glass Wind Chime
Proper care ensures your outdoor creation remains vibrant and functional for years. Regular maintenance keeps it looking and sounding its best, even in changing weather conditions. A little effort goes a long way in preserving its beauty and durability.
Start by cleaning the glass pieces with a vinegar solution. This removes dirt and grime while maintaining their shine. For deeper cleaning, use a soft cloth and mild detergent to avoid scratching the surface.
Seasonal checks are essential for long-term upkeep. Inspect the line and knots every few months to ensure they’re secure. Replace any worn or frayed components to prevent accidents.
- Rust Prevention: Apply a clear sealant to metal parts to protect against moisture.
- UV Protection: Use UV-resistant coatings to prevent color fading over time.
- Component Replacement: Keep spare glass pieces and line on hand for quick repairs.
- Winter Storage: Bring your chime indoors during harsh weather to avoid damage.
| Maintenance Task | Frequency |
|---|---|
| Cleaning | Monthly |
| Knot Inspection | Seasonally |
| Rust Prevention | Annually |
By following these steps, you’ll keep your creation in excellent condition. Regular care ensures it continues to enhance your outdoor space with its beauty and charm.
Conclusion
Crafting your own decorative piece is a fun and rewarding experience. From selecting materials to assembling the final product, each step brings you closer to a unique creation. This diy project allows you to express creativity while enhancing your outdoor space.
Personalize your design by experimenting with colors, shapes, and textures. Share your finished piece online to inspire others and showcase your craftsmanship. For those eager to explore more, advanced glassworking techniques offer endless possibilities.
Always prioritize safety during and after the project. Regular maintenance ensures your creation remains vibrant and functional. Enjoy the process and the beauty it brings to your surroundings.
Ready to take your skills further? Learn more about advanced glass techniques to expand your crafting journey.