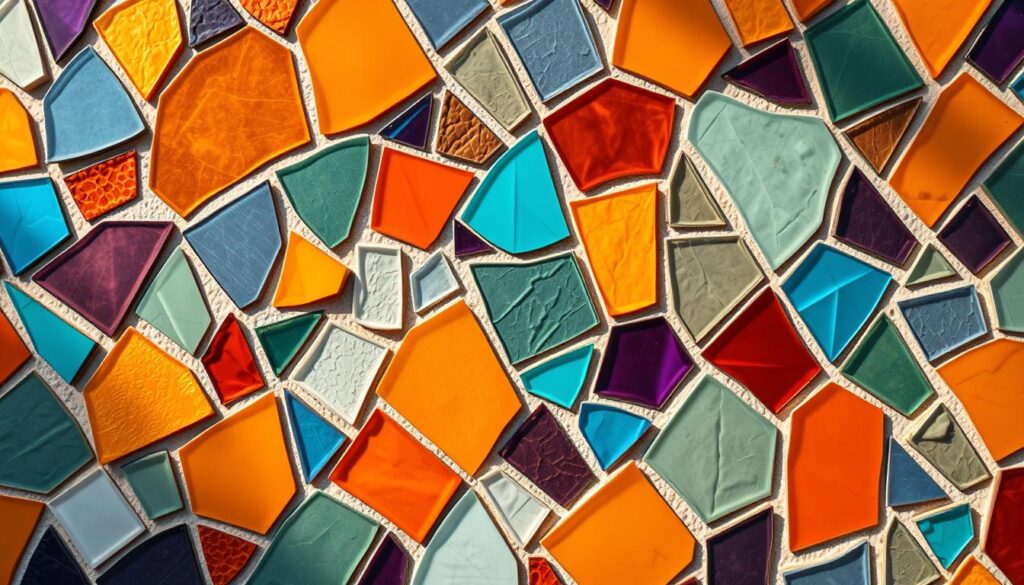
Creating beautiful glass mosaic art often requires working with unconventional shapes. Unlike standard mosaic tiles, irregular pieces add dynamic movement to your designs. The challenge lies in controlling fractures while honoring the material’s natural character.
Ancient builders understood this balance well. Just as Roman arches distribute weight efficiently, strategic cuts follow a glass’s internal structure. Modern tools like wheel-blade cutters help achieve cleaner breaks than traditional scoring methods.
Your toolkit should include tile nippers and protective gear. Embrace slight variations – they create organic charm in finished mosaic projects. The key is guiding fractures rather than forcing perfect geometry.
This approach transforms limitations into creative opportunities. With practice, you’ll develop an instinct for where and how to make each cut. The results? One-of-a-kind compositions that showcase glass’s luminous qualities.
Introduction to Cutting Glass for Mosaics
Glass has unique properties that influence every cut you make. Unlike other materials, it cools unevenly—corners solidify first, creating internal stress points. These hidden weak spots guide fractures when scoring or nipping.
Molded glass tiles often have embossed bottoms. Their textured surfaces cause unpredictable breaks, especially with corner-to-corner cuts. Work slowly and let the glass’s natural lines guide your tool.
Not all glass behaves the same. Vitreous tiles break cleanly, while recycled varieties may chip. Test scraps first to learn your materials’ quirks.
- Curved breaks often follow cooling patterns.
- Keystone-shaped triangles emerge from angled stress lines.
- Embracing these traits creates organic designs.
Successful mosaic work leans into imperfections. Think of fractures as collaborators, not mistakes. Your tools—cutters, nippers, and safety gear—help channel glass’s character into art.
Essential Tools for Cutting Irregular Glass Shapes
Mastering irregular glass cuts starts with the right equipment. The right tools help you work with the material’s natural breaks instead of against them. Whether you’re shaping curves or refining edges, each tool has a specific role.
Wheel-Blade Glass Cutters
Wheel-blade cutters use dual wheels to fracture glass with pressure, not scoring. They’re ideal for clean breaks but avoid using them on stone or porcelain. The mechanism reduces chipping, especially on delicate mosaic tiles.
Tile Nippers for Precision
Tile nippers excel at creating micro-tesserae from 8mm or 12mm tiles. Apply *controlled pressure* to avoid crushing the glass. Their sharp jaws let you nibble away small sections for organic shapes.
Glass Cutter and Running Pliers
A glass cutter scores lines, while running pliers snap thicker sheets along the mark. Hold the pliers perpendicular to the score for a clean break. This combo works best for straight lines or gentle curves.
Safety Gear You Shouldn’t Skip
Always wear impact-resistant goggles and cut-resistant gloves. Glass shards and sharp edges pose risks, especially when handling irregular shapes. Safety gear ensures you focus on creativity, not injuries.
| Tool | Best For | Limitations |
|---|---|---|
| Wheel-blade cutter | Clean curves | Not for stone/porcelain |
| Tile nippers | Micro-shapes | Requires practice |
| Running pliers | Straight lines | Struggles with tight curves |
Clare Clarrick’s floral mosaics show how combining these tools creates dynamic textures. Match your tool to the cut—nippers for details, wheel-blades for flowing lines.
Understanding Glass Behavior for Better Cuts
Glass behaves differently based on its composition and cooling process. When molten glass cools, corners solidify first, creating internal stress lines. These weak points determine where fractures form during cuts.
Vitreous mosaic tiles often have tic-tac-toe embossing, which resists diagonal breaks. Recycled glass, with minimal texture, fractures more predictably. Test scraps to learn your materials’ quirks before committing to a design.
Look for cooling patterns under bright light. Angled light reveals stress lines as faint shadows. Cutting along these lines—not against them—reduces chipping. For example, 12mm vitreous tiles break cleaner than 8mm enamel ones.
- Grid-patterned tiles: Follow embossed lines for controlled breaks.
- Recycled glass: Use light refraction to spot “safe” cutting zones.
- Stress lines: 45-degree angles often yield cleaner edges.
Adjust your technique based on the pattern and thickness. Thinner glass requires lighter pressure, while thicker pieces need steady scoring. Embrace these variations—they add organic charm to your work.
Step-by-Step: Cutting Basic Irregular Shapes
Shaping glass into custom forms requires patience and precision. Start with simple curves and angles before tackling complex designs. Each cut should work with the material’s natural tendencies, not against them.
Curves and Waves
For flowing lines, place a bowl template under the mosaic tile. Use tile nippers to take 5–7mm nibbles along the marked line. Smaller bites reduce jagged edges.
Triangles and Diagonals
Align cuts perpendicular to embossed ridges for clean 60° angles. Stress lines often guide fractures naturally. Nest imperfect triangles to mimic Roman arch patterns.
Small Circles and Arcs
Rotate the tile while making incremental nips with wheeled nippers. Secure pieces on sticky contact paper to prevent slipping. Diamond sanding pads smooth rough spots.
| Shape | Tool | Pro Tip |
|---|---|---|
| Curves | Tile nippers | Use templates for consistency |
| Triangles | Glass cutter | Follow embossed ridges |
| Circles | Wheeled nippers | Rotate tile 15° per nip |
Minor imperfections add charm. If a mosaic tile breaks unevenly, adjust your design. These variations create depth when spaced with grout.
Advanced Techniques for Complex Shapes
When tackling intricate designs, advanced techniques unlock new creative possibilities. Keystone principles—borrowed from ancient architecture—help distribute stress in arched patterns. Avoid placing concave edges near straight borders; the contrast often weakens structural integrity.
Combine straight-edge rulers with circular stencils for hybrid shapes. This method ensures precision while maintaining organic flow. For tessellation-ready pieces, overlap cuts by 1–2mm to account for grout lines.
- Half-keystone cuts: Ideal for radial designs, these angled fragments interlock like puzzle pieces.
- Grozing pliers: Refine inside curves after initial scoring, especially with thicker porcelain tiles.
- Mounting tape: Tile Hub’s method secures complex inlays during assembly, reducing slippage.
For corners, score lightly and snap gradually to prevent splintering. These approaches elevate your mosaic project from simple patterns to gallery-worthy art. Explore more mosaic techniques to refine your workflow.
Design Tips to Harness Imperfections
Imperfections in your work can become its strongest feature. Unlike uniform tiles, irregular shapes add movement and depth to your mosaic. Embrace flaws—they create organic charm that polished pieces can’t replicate.

Turn Flaws into Focal Points
Chipped edges or uneven breaks? Highlight them. Place these pieces where light catches their texture. Pebble Tile Shop’s designs prove roughness adds visual interest.
Try these approaches:
- Fibonacci sequences: Arrange mismatched triangles in nature’s favorite pattern.
- Color gradients: Blend cutting variations with transitional hues.
- Moiré effects: Offset tiles slightly for dynamic illusions.
Compose with Intention
Uniform rectangles create flat aesthetics. Instead, mix imperfect triangles and keystones. Their uneven edges interact with grout lines, adding dimension.
Break the pattern deliberately. A single jagged shape in a sea of curves draws the eye. Remember—your mosaic’s soul lives in its quirks.
Safety and Cleanup Best Practices
Safety should always come first when working with glass. Sharp edges and flying shards pose risks, but the right safety gear minimizes hazards. Always wear goggles, gloves, and long sleeves to protect yourself.
Wet saws and angle grinders need special attention. Keep water reservoirs full to reduce dust, and work in well-ventilated areas. These tools demand respect—never bypass safety features.
Set up a dedicated workspace with these steps:
- Use HEPA vacuums to capture fine particles.
- Lay mesh backing as a disposable cutting mat.
- Store tiles in labeled containers to avoid mix-ups.
After your project, clean tools thoroughly. Residue dulls blades and compromises cuts. Wipe wheel-blade cutters with a soft cloth and lubricate moving parts.
| Tool | Safety Measure | Cleanup Tip |
|---|---|---|
| Wet saw | Check water levels | Drain reservoir post-use |
| Angle grinder | Wear OSHA respirator | Brush off glass dust |
| Tile nippers | Inspect for cracks | Oil hinges monthly |
Handle shards with silicone-tipped tweezers or adhesive tape. Never sweep glass—it embeds in floors. A little caution goes a long way in keeping your workspace safe.
Common Mistakes and How to Avoid Them
Even experienced crafters encounter pitfalls when shaping glass for artistic work. Small missteps—like over-trimming slivers—leave jagged edges. Instead, preselect from multiple cuts to find the cleanest fit.
- Hourglass pieces: Narrow middles disrupt grout lines. Discard or repurpose them.
- Slipping tiles: Non-adhesive mounting films stabilize tiles during precise cuts.
- Blade misalignment: Check wet saws before use. A crooked blade ruins corners.
Recycled glass crumbles if over-cut. Use lighter pressure and stop before pulverization. For consistent angles, Tile Hub’s jig ensures uniformity without guesswork.
Test scraps first. Adjust techniques based on thickness and texture. Remember: Prevention saves more pieces than repairs.
Conclusion
Your journey with glass mosaics transforms raw materials into luminous art. With the right tools—wheel cutters, nippers, and safety gear—you can shape mosaic tiles into dynamic designs. Tile Hub’s 8mm and 12mm glass tiles are engineered for clean micro-cuts, ideal for intricate projects.
Experiment with their sample kits to refine your technique. Mastery here leads to professional-grade results, whether you’re crafting wall art or tabletops. For premium products, explore Pebble Tile Shop’s curated collections.
Always prioritize safety goggles and gloves. Remember—each imperfect cut adds character. Now, turn your vision into a shimmering reality.
