Preserving cherished beach memories can be a beautiful way to relive your favorite coastal adventures. One creative method is by using treasures found on the beach, such as sea glass, to create stunning decorative pieces.
You can transform these ordinary beach finds into extraordinary memory keepers. A shadow box provides the perfect way to display these treasures, allowing you to cherish family memories for years to come.
By creating your own sea glass shadow box, you can customize the design to match your personal style and highlight the specific memories you want to treasure. This guide will walk you through the process, making it accessible for both experienced crafters and beginners.
Capturing Beach Memories with Sea Glass
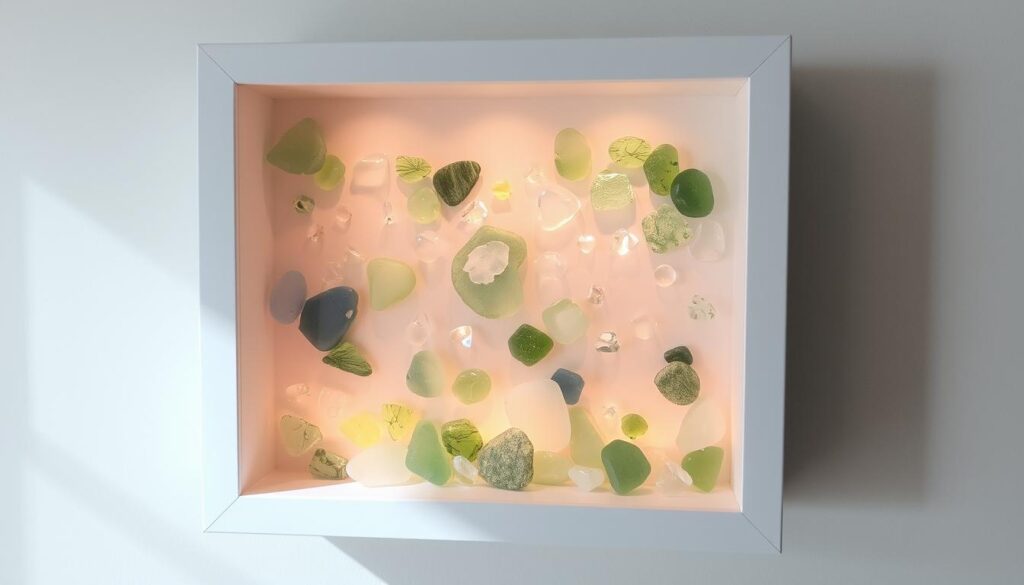
Capturing the essence of your beach experiences can be beautifully done with sea glass shadow boxes. Sea glass is created when discarded glass is tumbled and smoothed by ocean waves and sand over many years, resulting in frosted, smooth pieces in various colors that make perfect keepsakes.
These unique pieces can be displayed in shadow boxes, allowing you to create three-dimensional displays that preserve your memories in a way that flat frames cannot.
Why Sea Glass Makes Perfect Keepsakes
Sea glass is not only beautiful but also tells a story of its transformation from discarded glass to a treasured keepsake. Its smooth texture and varied colors evoke memories of the beach and the ocean.
Types of Shadow Boxes to Consider
When choosing a shadow box, consider the type that best suits your sea glass collection and personal style. Here are some ideas to get you started:
- Deep shadow boxes for layering and creating three-dimensional displays
- Divided shadow boxes for organizing sea glass by color or beach location
- Themed shadow boxes that incorporate nautical elements
Here’s a comparison of different shadow box types:
| Shadow Box Type | Description | Ideal Use |
|---|---|---|
| Deep Shadow Box | Provides more space for layering and creating three-dimensional displays | Multiple elements, including sea glass and other beach finds |
| Divided Shadow Box | Allows organization by color, beach location, or vacation year | Large collections of sea glass |
| Themed Shadow Box | Incorporates nautical elements like small anchors or maps | Enhancing the coastal aesthetic in your home |
By choosing the right shadow box, you can create a beautiful display that showcases your sea glass collection and brings back fond memories of your beach trips. Get creative with your home decor ideas and make it a unique piece of art.
Materials Needed for Your DIY Sea Glass Shadow Box
Gathering the right materials is the first step in creating a beautiful sea glass shadow box. You’ll need a few essential supplies to get started.
Essential Supplies

Essential supplies include a shadow box, which you can find at craft stores like Michaels or Hobby Lobby, sea glass that you’ve collected or purchased, a strong adhesive like hot glue, background material such as fabric or paper, and basic tools like scissors and a ruler.
Optional Decorative Elements
To add more character to your shadow box, consider incorporating optional decorative elements. These can enhance the overall decor and provide more ideas for personalization.
- Small shells and starfish complement sea glass beautifully.
- A small amount of sand adds authenticity.
- Photographs from your beach vacation can personalize your creation.
- Driftwood pieces add organic texture.
- Decorative elements like tiny anchors or rope accents enhance the nautical theme.
Creating Your DIY Sea Glass Shadow Box
Transforming your beach memories into a beautiful sea glass shadow box is easier than you think. This process involves several key steps that will help you create a stunning display of your beach treasures.
Preparing Your Shadow Box
Start by preparing your shadow box. You can paint the background or add material to create a unique setting for your sea glass and other treasures. This step allows you to personalize your shadow box and make it a beautiful piece for your home.
Arranging Sea Glass and Beach Treasures
Next, arrange your sea glass and other beach treasures in an appealing composition. You can create patterns or shapes with your sea glass, or opt for a more natural, scattered arrangement. This is where you can get creative and bring your ideas to life.

Securing Items in Place
Once you’re happy with your arrangement, secure your items in place using adhesive. Here are some tips to keep in mind:
- Work in small sections to maintain control over your arrangement.
- Use the right amount of glue to avoid overflow or insecurely attached items.
- Consider the height and dimension of your arrangement to create a dynamic display.
| Tips for Securing Items | Description | Benefits |
|---|---|---|
| Work in Small Sections | Apply adhesive to a few pieces at a time. | Maintains control over the arrangement. |
| Use Appropriate Glue Amounts | Avoid too little or too much glue. | Prevents overflow and ensures secure attachment. |
| Consider Arrangement Height | Vary adhesive amounts for different elevations. | Creates a more dynamic display. |
Conclusion
With your DIY sea glass shadow box complete, you’ll have a beautiful piece of coastal decor. This project transforms beach treasures into extraordinary keepsakes, serving as daily reminders of special moments. It’s a unique way to preserve memories and enhance your living space.
You’ll cherish the personalized creation that reflects your beach adventures and style. It also makes a thoughtful gift for those who appreciate handcrafted coastal decor, celebrating your connection to the sea.