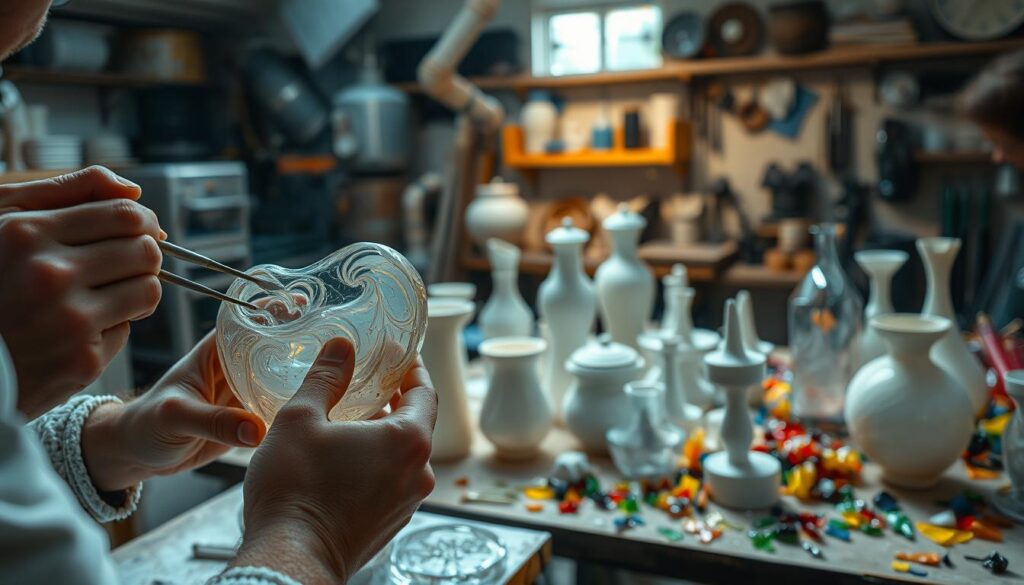
Creating beautiful pieces through glass art is both a creative and technical journey. This craft allows you to explore endless possibilities, blending artistry with precision. Whether you’re a beginner or an experienced artist, the process is both rewarding and inspiring.
Ceramic and steel molds are essential tools in this world of creativity. They help shape functional items like serving ware and decorative pieces such as garden ornaments. The versatility of these molds makes them a favorite among modern craft enthusiasts.
From sculptural art to everyday objects, the applications are vast. Dive into this guide to learn about the tools, techniques, and safety measures needed to start your own projects. Get ready to unlock your creative potential!
Introduction to Glass Shaping with Molds
Transforming flat sheets into stunning designs is the essence of glass shaping. This process, known as glass slumping, relies on a kiln to heat the material to temperatures up to 1300°F. Gravity then helps the molten glass take the form of a mold, creating bowls, plates, or even sculptures.
Precision is key in this art. The glass must be heated slowly to avoid cracking, and the mold must be carefully prepared to ensure the desired shapes. Once the glass has taken its form, it undergoes a cooling process called annealing, which occurs between 700-1000°F. This step prevents stress fractures and ensures durability.
For those eager to learn, The Crucible offers hands-on classes that guide you through the process. These sessions are perfect for exploring the artistic potential of combining colors and textures in your projects. Whether you’re crafting functional items or decorative pieces, the possibilities are endless.
Understanding Glass Slumping and Fusing
Exploring the art of glass shaping reveals two fascinating techniques: slumping and fusing. Both methods allow you to create stunning pieces, but they serve different purposes and require unique approaches. Understanding these processes can help you choose the right technique for your project.

What is Glass Slumping?
Glass slumping involves reshaping pre-fused glass using molds and controlled gravity. The temperature for slumping typically ranges between 1200-1300°F, which is lower than fusing. This process allows the glass to take on three-dimensional forms, such as bowls or plates, without bonding multiple layers.
To avoid air bubbles, fusing must occur before slumping. This ensures the glass is stable and ready for reshaping. Janet Hiebert, with 35 years of expertise in kiln-fired glass, emphasizes the importance of using compatible glass types, such as Bullseye 90 COE or System 96, to prevent stress fractures.
Glass Slumping vs. Glass Fusing
While slumping focuses on reshaping, glass fusing involves bonding multiple layers of glass at higher temperatures, usually above 1500°F. Fusing is ideal for creating intricate designs and patterns, while slumping is perfect for achieving 3D forms.
It’s crucial to avoid mixing incompatible materials, like bottle glass or marbles, without proper checks. This ensures the final piece is durable and free from defects. By mastering both techniques, you can expand your creative horizons and produce unique, functional art.
Essential Tools for Working with Molds
To create stunning glass art, having the right tools is essential. The quality of your molds, kiln, and safety gear can make or break your project. Whether you’re a beginner or a seasoned artist, understanding these tools will help you achieve precise and beautiful results.
Choosing the Right Mold
Selecting the right mold depends on the effect you want to achieve. Ceramic molds are ideal for textured designs, while steel molds offer a smooth finish. Both materials can withstand high heat, making them durable options for glass shaping.
| Feature | Ceramic Molds | Steel Molds |
|---|---|---|
| Texture | Textured designs | Smooth finish |
| Durability | High heat resistance | High heat resistance |
| Preparation | Requires kiln wash | Requires kiln wash |
Kiln and Safety Equipment
Your kiln is the heart of your glass art setup. Brands like Paragon and Hot Shot are known for their reliable temperature control, making them great choices for beginners. Always use safety gear, including heat-resistant gloves and infrared glasses, to protect yourself during the process.
Preparing your mold is equally important. Apply 2-3 coats of kiln wash to prevent the glass from sticking. For DIY enthusiasts, fiberboard or clay molds can also work with proper preparation.
Preparing Your Workspace
A well-organized workspace is the foundation of successful glass art projects. Whether you’re a beginner or an experienced artist, setting up your room correctly ensures safety and efficiency. Start by clearing clutter and arranging your tools for easy access.

Setting Up Your Kiln
Proper kiln setup is crucial for consistent results. Place your kiln on a level surface, ensuring it’s at least 2 inches away from walls or other elements. Use shelf posts to position your shelf correctly inside the kiln. Follow the manufacturer’s instructions for optimal placement and safety.
Applying Kiln Wash
Applying kiln wash to your molds and shelves prevents the glass from sticking. Mix the wash thoroughly and apply it in 2-3 thin layers, allowing each coat to dry completely. This ensures even coverage and reduces the risk of defects in your finished pieces.
Store your molds carefully to avoid chipping or damage. A well-prepared workspace not only enhances your workflow but also minimizes common issues like uneven drying or cracking. For detailed firing schedules, refer to Glass Campus’ guide for optimal results.
Working with Molds: Shaping Glass with Ceramic and Steel Forms
Different methods can transform your projects into unique, functional pieces. Each technique offers distinct advantages, allowing you to achieve specific designs and textures. Whether you’re crafting platters or vases, understanding these approaches ensures success.
Over the Mold Technique
This method involves draping material over steel forms to create organic, unpredictable shapes. It’s ideal for achieving flowing, natural designs. The thickness of the material plays a crucial role in how it drapes, so choose wisely.
Into the Mold Technique
Ceramic forms are perfect for this approach, as they ensure precise replication of details. Air holes in the mold prevent trapped air, which can distort the final piece. This technique is commonly used for intricate projects like vases or decorative items.
Through the Mold Technique
For geometric designs, fiberboard drop rings are your go-to. This method allows you to create sharp, clean edges and structured forms. It’s a great way to experiment with different textures and patterns.
Remember, overusing molds can degrade their quality, especially ceramic ones. After 30+ firings, details may become less defined. For more insights on these techniques, check out this guide on glass shaping.
Step-by-Step Guide to Slumping Glass
Mastering the art of slumping glass requires attention to detail and patience. This process transforms flat sheets into stunning 3D forms, offering endless creative possibilities. Follow these steps to achieve professional results and bring your vision to life.
Step 1: Prepare Your Glass
Start by cutting your glass to the desired size and shape. Smooth the edges using a grinder to prevent cracks. Clean the surface thoroughly to remove labels, dust, and fingerprints. This ensures a flawless finish and avoids imperfections during firing.
Step 2: Load Your Mold
Center the glass on your mold to ensure even shaping. Check that the mold is level and positioned correctly in the kiln. Maintain a safe distance between the glass and kiln walls to prevent overheating. Proper loading is crucial for consistent results.
Step 3: Firing Your Piece
Follow a precise firing schedule to achieve the desired temperature. For example, ramp to 1250°F at 300°F per hour. Soak times vary based on thickness—20 minutes for 6mm glass. This step ensures the glass softens evenly and takes the mold’s shape.
| Stage | Temperature | Rate |
|---|---|---|
| Ramp | 1250°F | 300°F/hour |
| Anneal | 900°F | 150°F/hour |
Step 4: Cooling and Annealing
Cool the glass slowly to prevent stress fractures. Anneal at 150°F per hour until it reaches 900°F. This gradual cooling process strengthens the piece and ensures durability. Rushing this step can lead to cracks or breakage.
Step 5: Finishing Touches
Once cooled, inspect your piece for any rough edges or imperfections. Use a grinder or polisher to smooth the surface. Add coldworked details for a unique touch. These finishing techniques enhance the final look and feel of your creation.
Creative Project Ideas
Unleash your creativity with unique glass art projects that blend functionality and beauty. Whether you’re a beginner or an experienced artist, these ideas will inspire you to create stunning pieces for your home, garden, or as gifts. Let’s explore some exciting designs that showcase your skills and artistic vision.
Bowls and Platters
Functional yet artistic, bowls and platters are perfect for showcasing your skills. Experiment with color combinations and embedded textures to create cheese boards or wine bottle platters. These pieces are not only practical but also add a touch of elegance to your dining table.
Art Pieces and Sculptures
For those who love abstract or layered designs, consider creating wall art or garden globes. Use multiple layers of glass to achieve depth and dimension. Advanced artists can explore multi-mold sculptures using modular forms for intricate details.
Garden and Outdoor Decor
Bring color and life to your outdoor spaces with sun catchers, garden stakes, or textured wind chimes. These projects are perfect for adding a personal touch to your garden while showcasing your creativity. For a sustainable twist, try using recycled materials like slumped bottle bottoms as coasters.
Tips and Tricks for Successful Slumping
Achieving flawless results in slumping requires a mix of precision and creativity. Whether you’re a beginner or an experienced artist, these tips will help you avoid common pitfalls and elevate your projects. Let’s dive into the best practices for mastering this technique.
Avoiding Common Mistakes
One of the most frequent mistakes is rapid cooling, which can lead to cracks. Always follow a controlled cooling schedule to ensure durability. Another issue is air bubbles, which can be minimized by lowering ramp rates and using pre-dried molds.
To check COE compatibility, use polarizing filters. This ensures your materials work well together, preventing stress fractures. If cracks appear, adjust annealing times or verify COE compatibility for a smoother surface.
Experimenting with Textures and Colors
Adding unique colors and textures can make your pieces stand out. Layer frits or stringers between sheets for depth and dimension. For interesting patterns, press lace or leaves into the kiln wash before firing.
Document your firing schedules for repeatable results. This way, you can replicate successful experiments and refine your techniques. With the right tools and creativity, your projects will shine.
Conclusion
The world of glass art offers endless opportunities to explore your creativity and refine your skills. Whether you’re creating functional pieces or decorative designs, this craft allows you to express yourself in unique ways. Don’t be afraid to experiment with advanced techniques and materials to achieve stunning results.
Continued learning is key to mastering this art. Consider joining classes at The Crucible or exploring resources from Bullseye Glass. Always prioritize safety, from workspace setup to handling tools and equipment.
Share your projects online or connect with local glass-art communities to inspire others and grow your network. Your journey in this creative field is just beginning—embrace the possibilities!