Transforming plain surfaces into vibrant works of art starts with understanding powdered glass fusion. This craft, practiced for over 2,600 years, bonds crushed glass to metals like copper or silver through controlled heat. Early artisans used it for ceremonial jewelry, while today’s applications range from cookware to wall panels.
Modern projects require precision. Firing temperatures between 1,400°F and 1,650°F melt the glass powder, creating smooth, durable finishes. You’ll encounter two primary methods: wet application (mixing enamel with water) and dry sifting. Each approach impacts texture and color intensity differently.
Safety anchors every successful project. Proper ventilation, heat-resistant gloves, and eye protection prevent accidents during firing. Whether using a kiln or handheld torch, workspace preparation matters as much as artistic vision.
This journey blends creativity with science. You’ll learn how centuries-old practices meet contemporary tools, ensuring your designs withstand time while expressing unique style. Mastery begins with respecting the process—your gateway to turning raw materials into shimmering masterpieces.
What is Glass Enameling?
For millennia, artisans have transformed metals into colorful masterpieces using powdered glass. This craft, called vitreous enamel, creates permanent bonds between crushed glass and surfaces through precise heat application. Whether decorating jewelry or coating industrial components, the process relies on controlled fusion at specific temperatures.
Definition and Overview
Glass enameling involves melting finely ground glass particles onto metal or glass substrates. The powder becomes a glossy, chip-resistant layer when heated between 1,300°F and 1,600°F. You’ll find this technique in cookware, decorative art, and even architectural panels—all sharing that signature glass-metal bond.
Historical and Artistic Context
Six gold rings from 13th-century B.C. Cyprus show the earliest known enamel work. Byzantine artists later refined methods for religious icons, using layered colors to mimic stained glass. By the Renaissance, French workshops in Limoges pioneered techniques like Grisaille, painting intricate scenes with enamel “paints.”
What began as a substitute for gemstones in royal crowns evolved into modern industrial coatings. Today’s applications preserve the craft’s artistry while meeting demands for durability and heat resistance.
A Beginner’s Guide to Glass Enameling: Tools, Techniques, and Safety
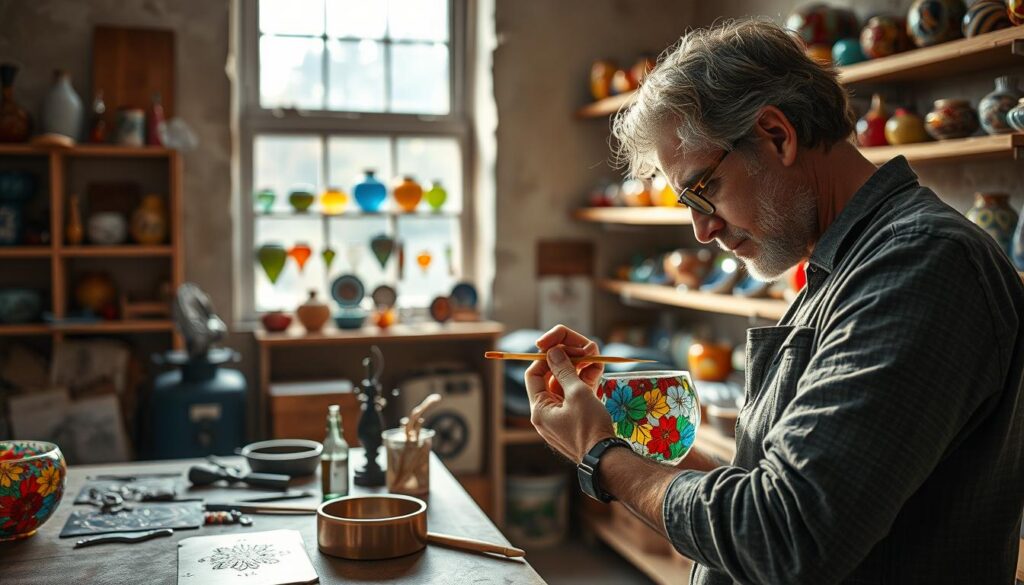
Planning your enameling work starts with visualizing the final piece. Crushed glass powders might appear muted at first, but their true vibrancy emerges during firing. This transformation impacts material choices and technique selection for your specific goals.

Ask yourself three questions before beginning: What’s the primary purpose? Which materials will you use? How complex is the design? Jewelry pieces demand precision with delicate layers, while wall art allows bolder experimentation. Your answers shape equipment needs and workflow.
| Project Type | Preferred Materials | Firing Method | Enamel Mesh Size |
|---|---|---|---|
| Jewelry | Silver, Gold | Torch | 80-400 mesh |
| Decorative Objects | Copper, Steel | Small Kiln | 40-80 mesh |
| Architectural | Stainless Steel | Industrial Kiln | 20-40 mesh |
Multi-layer designs need careful scheduling. A pendant with color gradients might require four firing cycles over two days. Larger installations could involve team coordination and specialized ventilation systems. Always match your timeline to the technique’s demands.
Substrate thickness matters too. Thin copper sheets warp easier than heavy-gauge steel during heating. Test small samples if combining materials or trying new patterns. Scope assessment prevents wasted resources and elevates your craftsmanship.
Essential Tools for Glass Enameling
Crafting lasting enamel art demands the right equipment. Your workspace setup determines both safety and results. Two categories dominate this craft: heat sources for fusion and applicators for precision.
Kilns, Torches, and Firing Equipment
A quality kiln maintains 1,450–1,500°F for metal projects. Smaller models work for jewelry, while architectural pieces need industrial units. Always use kiln shelves and trivets to prevent warping.
Torch firing suits portable projects. Oxygen-propane mixes reach necessary temperatures for detailed work. Pair these with heat-resistant gloves and safety glasses—opening hot kilns without protection risks burns.
Application Tools: Sifters, Brushes, and Spreaders
Mesh screens control enamel distribution. A 40-mesh sifter applies 80-mesh base coats smoothly. For wet techniques, natural sable brushes create sharp details without shedding hairs.
Metal spatulas spread thick layers evenly. Experiment with fusing and slumping glass using these tools for textured effects. Ventilation systems remain critical when working with fine powders.
Your toolkit grows with experience. Start with core items, then expand as you master each method. Proper equipment turns raw materials into professional-grade products.
Glass Enameling Techniques
Mastering surface effects requires choosing between two foundational approaches. Each method offers distinct advantages depending on your project’s texture needs and complexity.
Wet Application vs. Dry Sifting Methods
Dry sifting works best for uniform coverage. You’ll shake 80-mesh enamel through screens like powdered sugar. This creates even layers ideal for base coats. Pro tip: Hold the screen 6 inches above your metal surface for optimal distribution.
Wet packing lets you sculpt details. Mix enamel particles with water until they resemble thick paint. Use sable brushes to push the slurry into intricate patterns. Keep the mixture moist—dry edges crack during fusing, while excess water causes colors to bleed.
Firing Processes: Kiln Firing and Torch Firing
Kilns deliver consistent results for multi-layer pieces. Program them to hold 1,450°F for 3 minutes—this melts enamel smoothly without warping thinner metals. You lose visual control but gain repeatability.
Torches put you in direct command. Watch powders transform into glossy surfaces as you apply heat. This way of working suits small jewelry repairs and quick tests. Rotate the piece constantly to prevent hot spots.
| Method | Temperature Control | Best For | Surface Finish |
|---|---|---|---|
| Kiln | Precise | Multi-layer projects | Glass-smooth |
| Torch | Manual | Quick adjustments | Textured effects |
Combine both techniques for mixed-media pieces. Start with kiln-fired bases, then add torch-melted accents. This hybrid approach expands your creative possibilities while maintaining structural integrity.
Exploring Enameling on Metal and Glass
Choosing the right substrate transforms your creative vision into durable art. Different materials demand unique preparation methods and firing adjustments to achieve flawless results. Let’s examine how metal and glass surfaces shape your approach to this craft.

Metal Enameling Fundamentals
Copper stands out as the ideal starting point for new artists. Its thermal expansion rate matches most enamel powders, reducing cracking risks. Clean surfaces meticulously—heat copper until orange oxidation appears, then scrub with pickle solution. This removes contaminants that cause uneven adhesion.
Premium jewelry projects thrive on precious metals. Sterling silver and 14-karat gold handle repeated firings without warping. For industrial pieces, 400-series stainless steel requires specialized enamels formulated for strong bonding. Always test small samples before committing to large-scale work.
Adapting Techniques for Glass Surfaces
Glass demands strict coefficient of expansion (COE) matching. Standard window glass (84 COE) pairs with Thompson 5000 and 6000 series enamels. Unlike metals, glass surfaces need gentle cleaning with alcohol—scratching ruins transparency. Apply thinner layers to prevent stress fractures during cooling.
| Material | Preparation | Firing Adjustment |
|---|---|---|
| Copper | Oxidation removal | 1,450°F base coats |
| Window Glass | Alcohol wipe | 50°F lower than metal |
| Stainless Steel | Acid etching | Extended soak time |
Switching between substrates? Lower kiln temperatures by 50°F when moving from metal to glass projects. This compensates for differing expansion rates while maintaining enamel flow. Track these adjustments in a firing log for consistent outcomes across materials.
Understanding Temperature and Firing Requirements
The secret to flawless enameling lies in mastering thermal dynamics. Your ability to control heat application determines whether colors fuse smoothly or develop stress fractures. Three factors govern success: precise temperature ranges, controlled cooling cycles, and material-specific adjustments.
Material-Specific Heat Settings
Metals demand 1,450-1,500°F for proper enamel bonding. Copper sheets fuse best at 1,475°F, while stainless steel needs 50°F higher. Glass substrates require gentler treatment—1,430°F prevents warping in window panels and stained glass art.
| Material | Ideal Temp | Firing Time |
|---|---|---|
| Copper | 1,475°F | 3 minutes |
| Stainless Steel | 1,525°F | 4.5 minutes |
| Window Glass | 1,430°F | 2.5 minutes |
Stress Relief Through Controlled Cooling
Rapid cooling creates invisible stresses that weaken bonds over time. Program your kiln to descend to 950°F after firing, holding for 30 minutes. This annealing phase lets molecules rearrange gradually.
Watch for three visual cues during torch work:
Wet sugar stage (45 seconds) signals initial melting.
Orange peel texture appears at 1 minute.
Full gloss develops by 2 minutes—your signal to begin cooling.
Thicker pieces need slower rate adjustments. A 6mm copper pendant cools safely at 15°F per minute, while 3mm sheets handle 25°F drops. Track these variables in a firing journal to refine your approach.
Safety Considerations for Glass Enameling
Creating vibrant enamel art demands more than skill—it requires rigorous safety practices. Every stage exposes you to extreme temperatures and fine particles. Proper protocols protect both your health and the quality of your work.
Protective Gear and Proper Ventilation
Heat-resistant gloves and safety glasses form your first defense against burns. These essentials shield hands and eyes when opening kilns at 1,500°F. Never handle hot materials without them—even “cooled” pieces retain dangerous warmth for hours.
Ventilation systems filter airborne glass dust and fumes. Install exhaust fans or work near open windows. For extended powder handling, NIOSH-approved respirators prevent lung irritation. Store equipment away from food areas to avoid accidental ingestion.
Safe Handling of Hot Materials and Chemicals
Designate separate zones for firing and cooling. Use ceramic tiles or steel racks for hot products, keeping them distant from flammable solvents. Always wash hands thoroughly before eating—even tiny glass particles pose risks if swallowed.
Organize workspaces with clear emergency exits. Keep fire extinguishers accessible and inspect kilns monthly for electrical issues. Develop routines: check gloves for tears, test ventilation airflow, and review burn treatment steps before starting any project.
Working with Different Materials: Glass, Metal, and Stainless Steel
Unlocking each material’s potential begins with understanding their unique relationships with heat and enamel. Successful projects balance artistic vision with scientific precision—your choice determines durability, color brilliance, and structural integrity.
Material Compatibility and Surface Preparation
Copper’s thermal expansion coefficient makes it the most forgiving metal for beginners. Its natural compatibility with multiple enamel types reduces cracking risks during cooling cycles. Always remove oxidation layers through pickling before applying base coats.
Working with stainless steel demands stricter protocols. Use 400-series magnetic grades paired with Thompson 5000/6000 enamels. These formulations prevent flaking on steel surfaces by matching expansion rates. Acid etching creates microscopic grooves for better adhesion.
Glass substrates require COE matching between enamel and base material. Clean surfaces with alcohol instead of abrasives to maintain transparency. Apply thinner layers than you would on metals to avoid thermal stress fractures.
Key compatible metals include silver, gold, and low-carbon steel. Each requires specific preparation:
• Copper: Remove fire scale with pickle solution
• Stainless steel: Etch with nitric acid
• Glass: Degrease with lint-free cloths
Reference the Thompson Enamel Workbook for advanced metal combinations. Proper surface treatment turns challenging materials into reliable canvases for your designs.